You’re strolling down the street in search of a new purchase. You come across two stores. One looks like your run-of-the-mill, generic establishment—nothing really catches your eye. The other? Oh, it’s a whole different story. Its storefront is sleek, visually stunning, and beckons you with tempting offers and crystal-clear visuals. Which one do you enter? Exactly.
That split-second decision illustrates the power of a first impression. And in the realm of online customer engagement, that’s where the welcome screen comes into play. It’s like the front door to your digital chat. Whether you’re running a support or sales line, it’s decked out with your brand’s logo and custom texts to captivate your visitors from the get-go.
Now, imagine this welcome screen not just as a pretty facade but as a Swiss Army knife of utility. With special addons for HelpDesk and KnowledgeBase, your visitors can dive straight into self-service without even starting a chat. Need to schedule meetings or grow your subscriber list? Just add your own custom links, and you’re good to go. What if they need to chat? The option is right there, always available. That’s omnichannel for you!
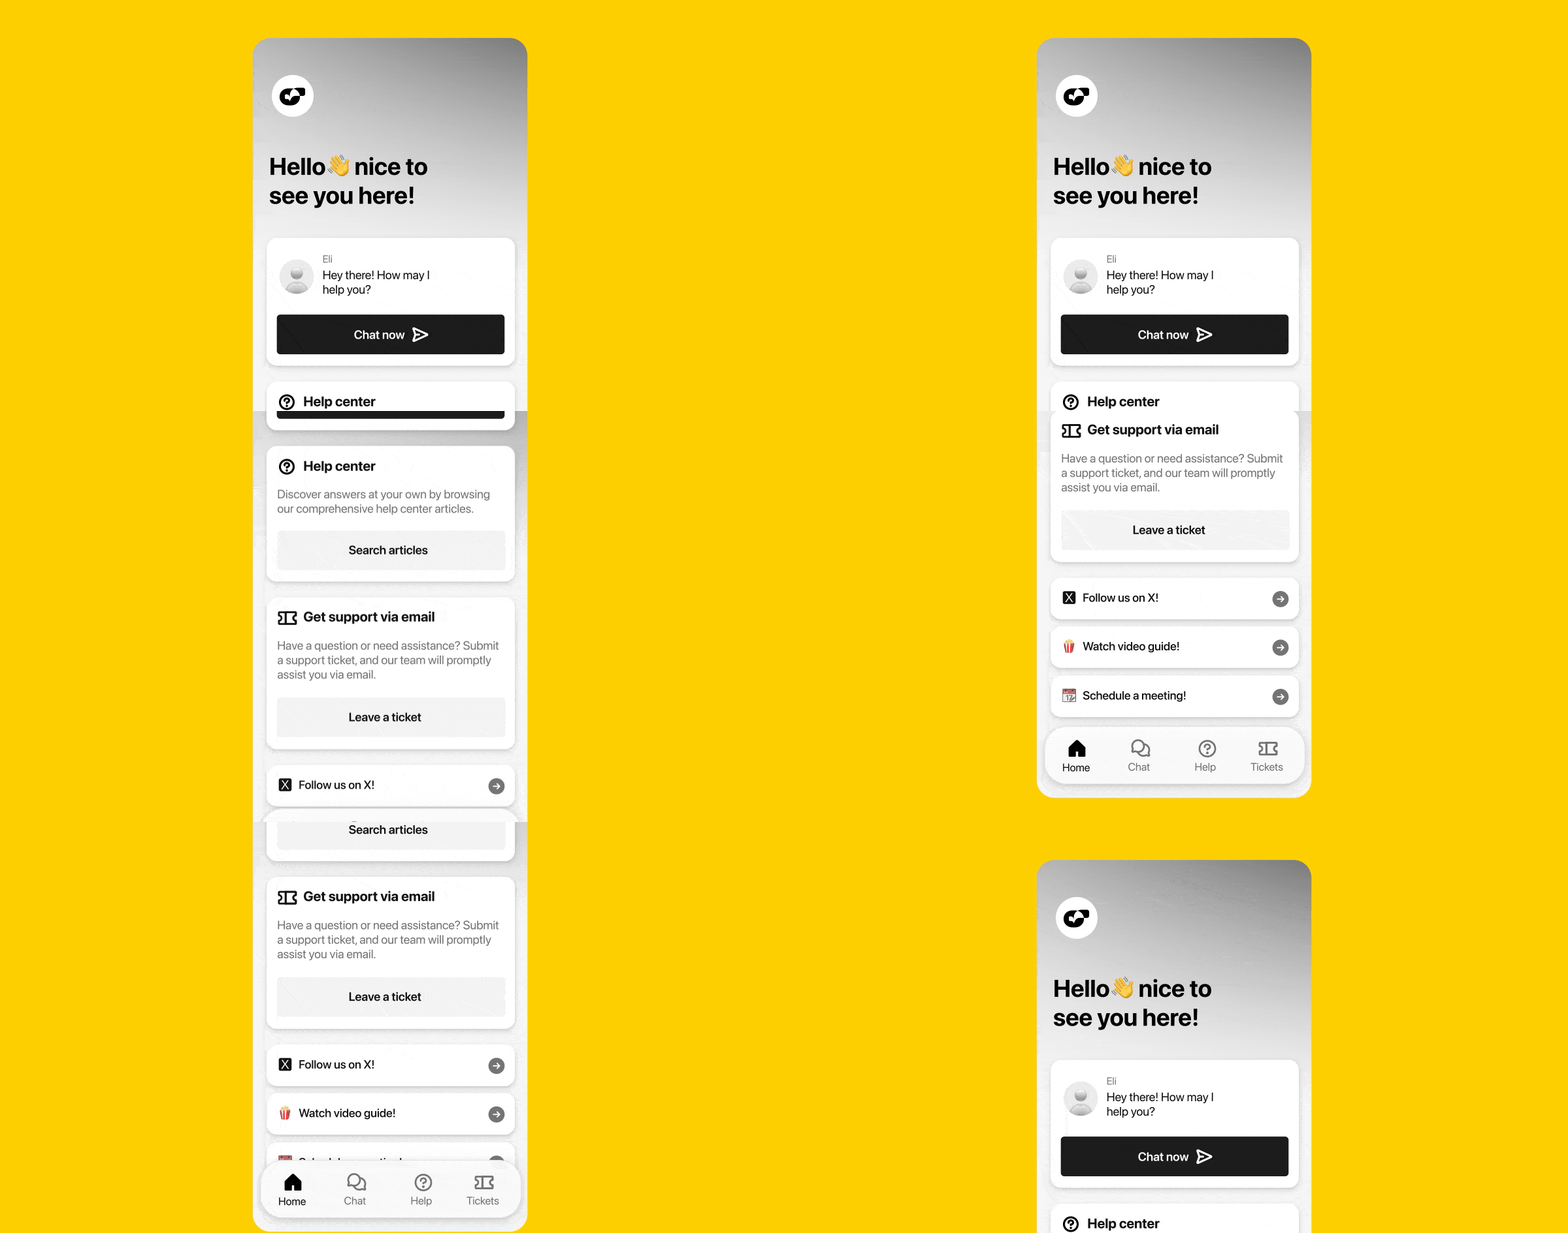
And it’s super easy to set up! Dive into the details and create your own welcome screen:
1. Enable your welcome screen
Add a sleek, elegant, and useful front to your chat widget.
2. Customize your welcome screen with a custom logo and welcome text
Show off your brand’s uniqueness with a custom logo that fits your website design. Attract customers with a sincere welcome.
Open the whole omnichannel to your audience. Make your services available in one place. Serve the best experience to your customers in an intuitive and convenient way.
Switch on/off your welcome screen
- Navigate to the welcome screen settings section.
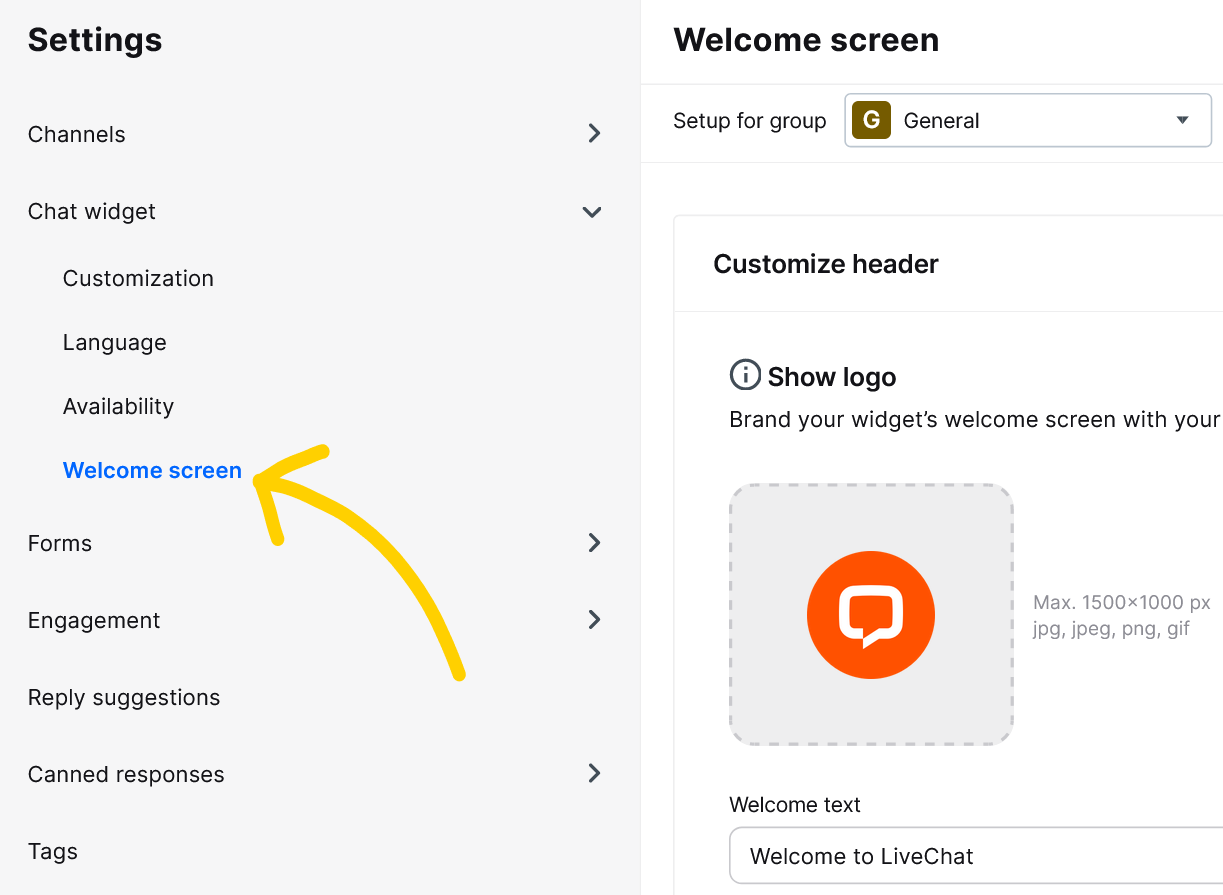
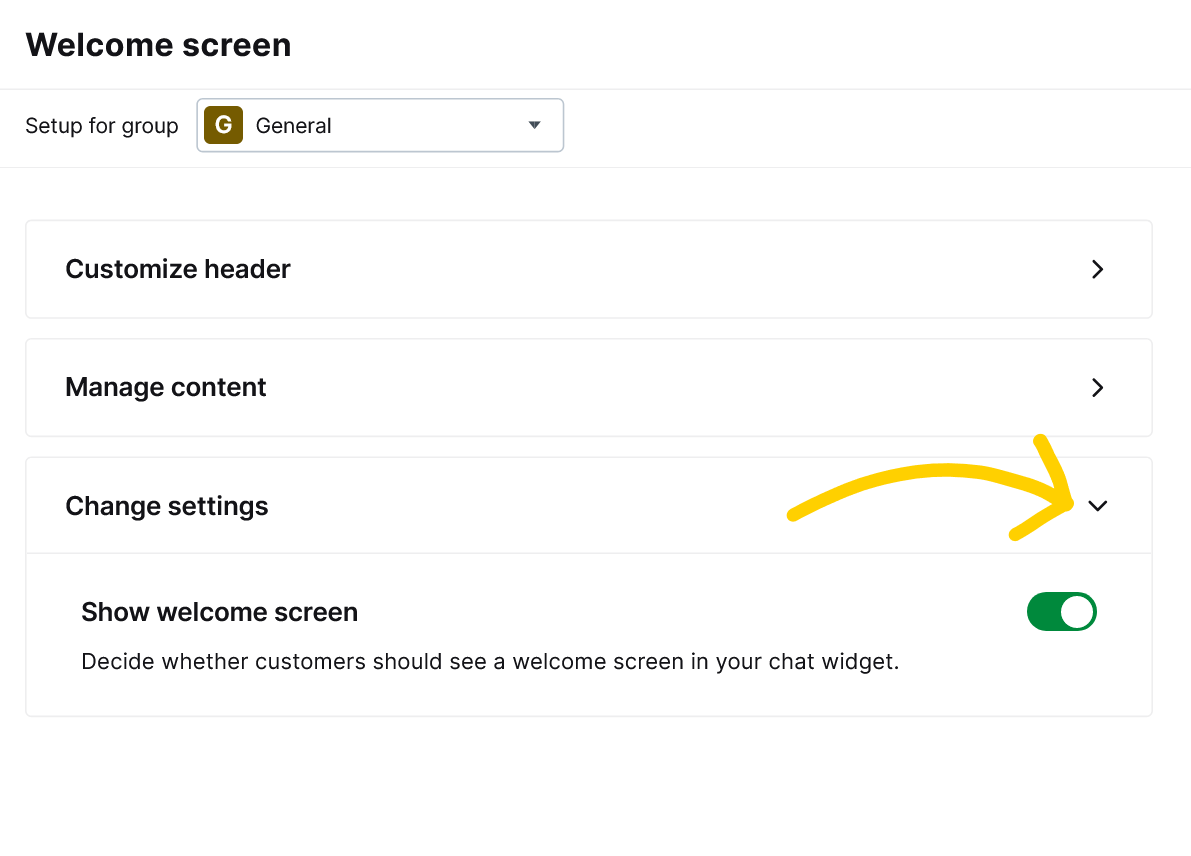
- Scroll down and expand the Change settings drop-down menu.
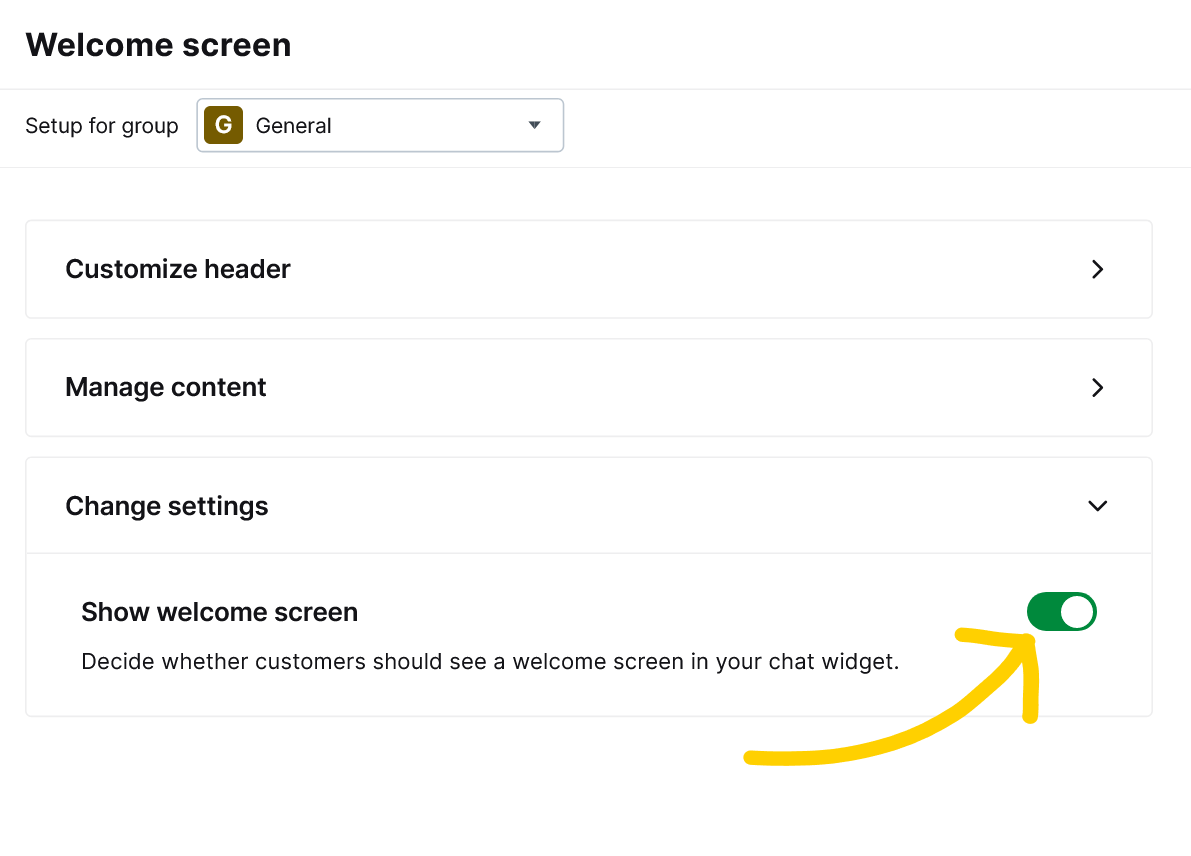
- Toggle on/off your welcome screen.
- Save changes to complete the setup.
Customize your welcome screen header
- Start by navigating to the welcome screen settings section.
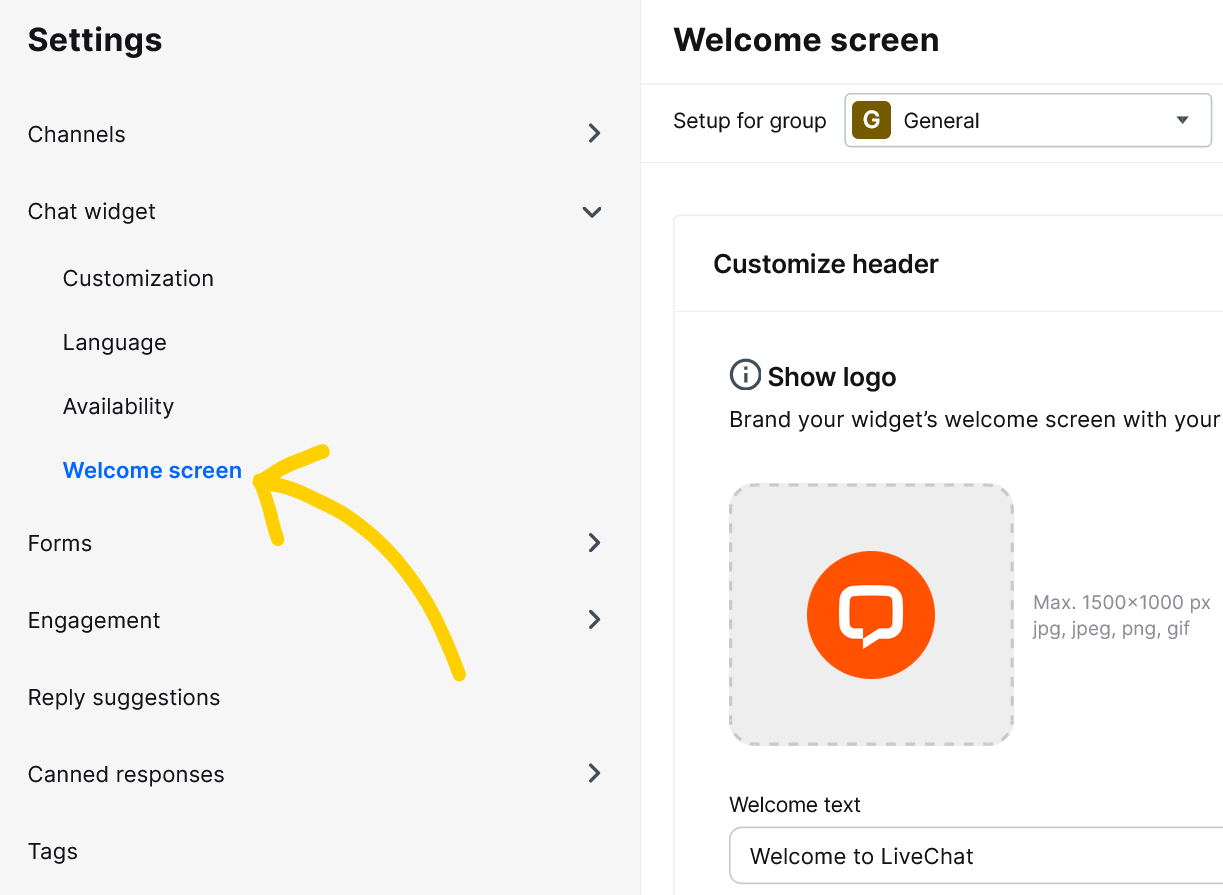
- Expand the Customize header drop-down menu.
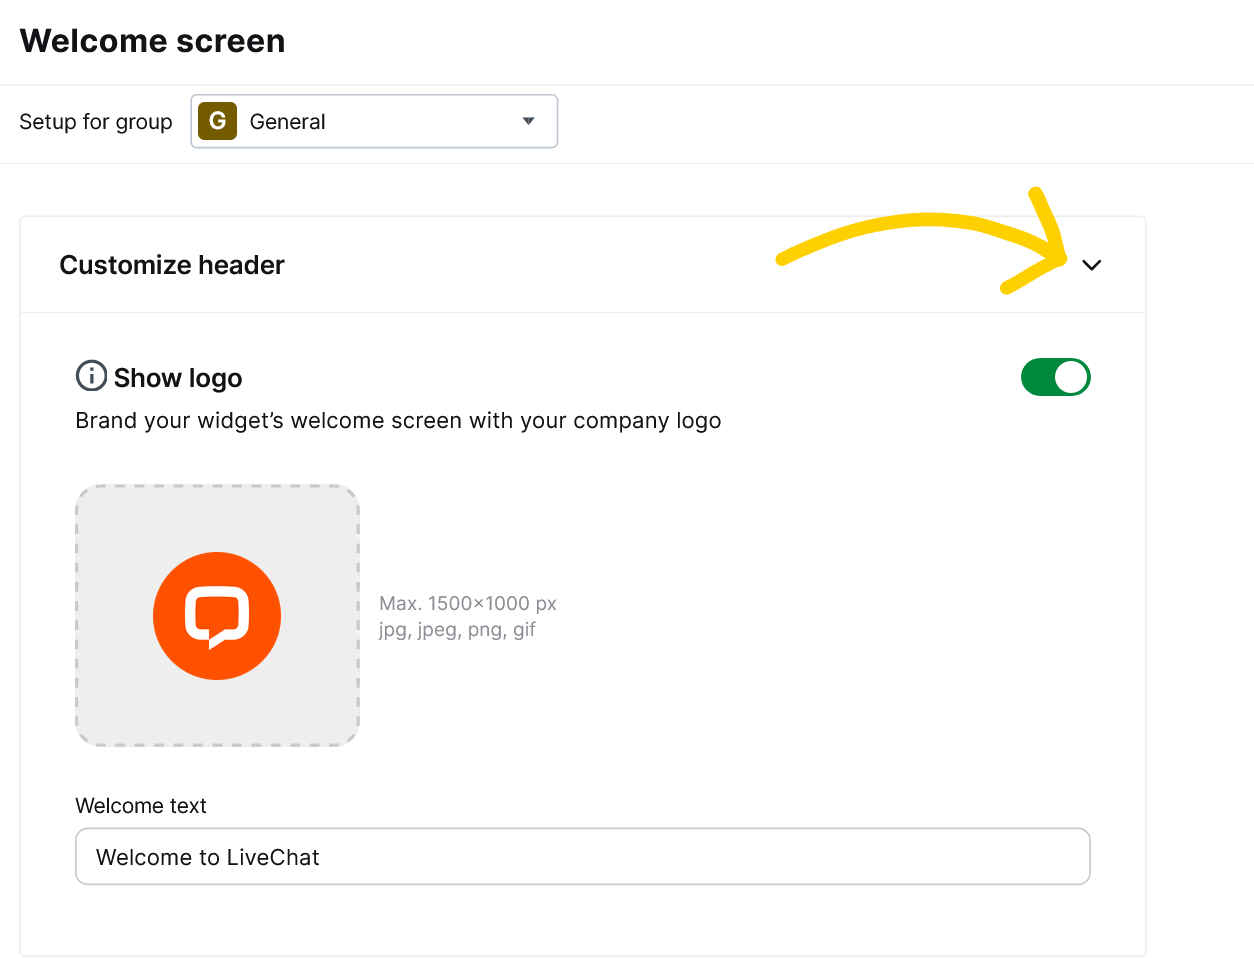
- You can upload your logo, hide it, and manage the welcome text.
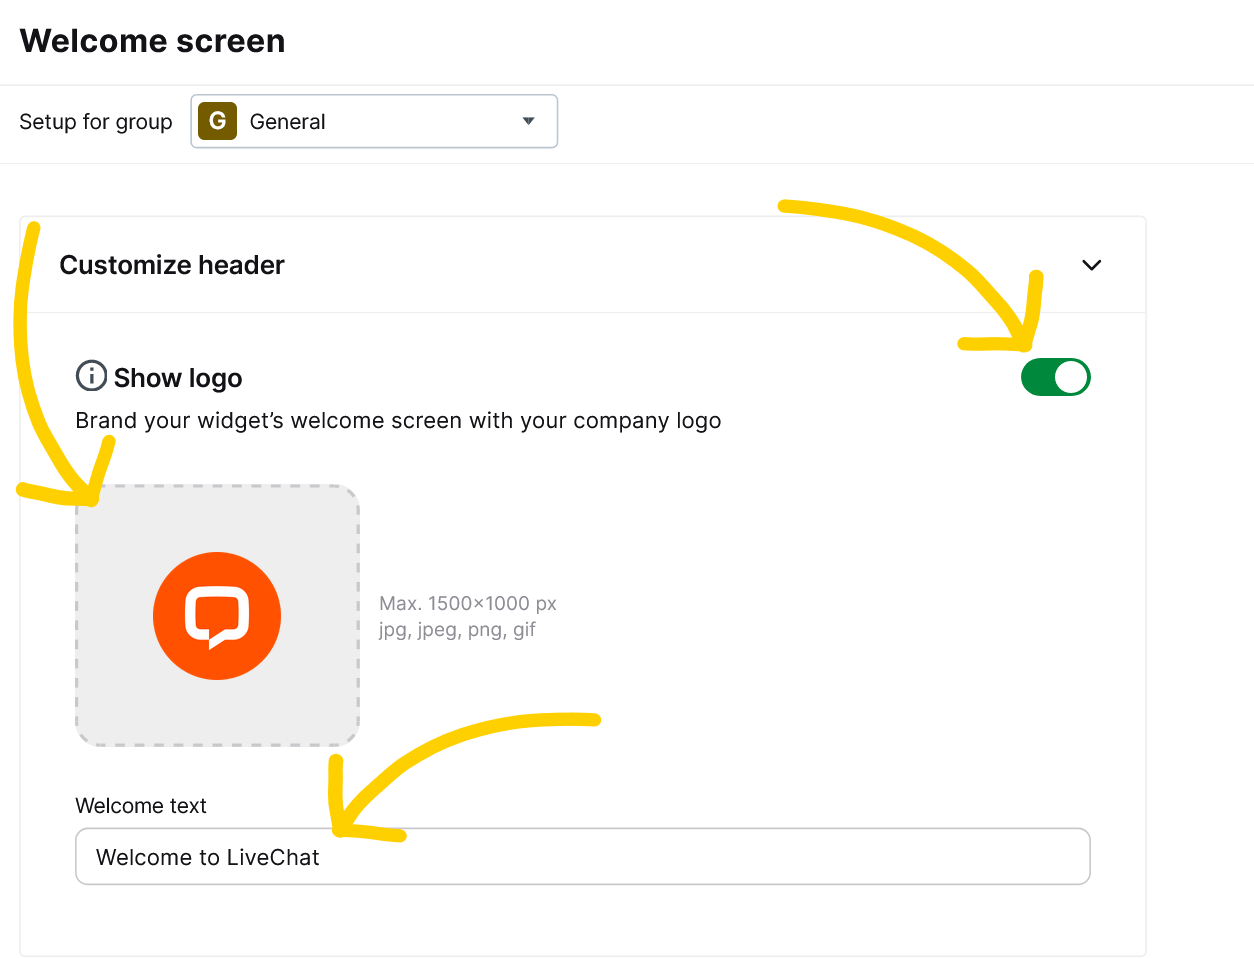
- Save changes to complete the setup.
Add and customize a KnowledgeBase search bar, HelpDesk ticket form, and custom links
- Display a ticket form in your chat widget. Provide support when you’re offline.
- Add a KnowledgeBase search bar to let your customers browse articles inside a chat.
- Improve your customers’ experience by linking relevant services right where they seek contact with your brand.
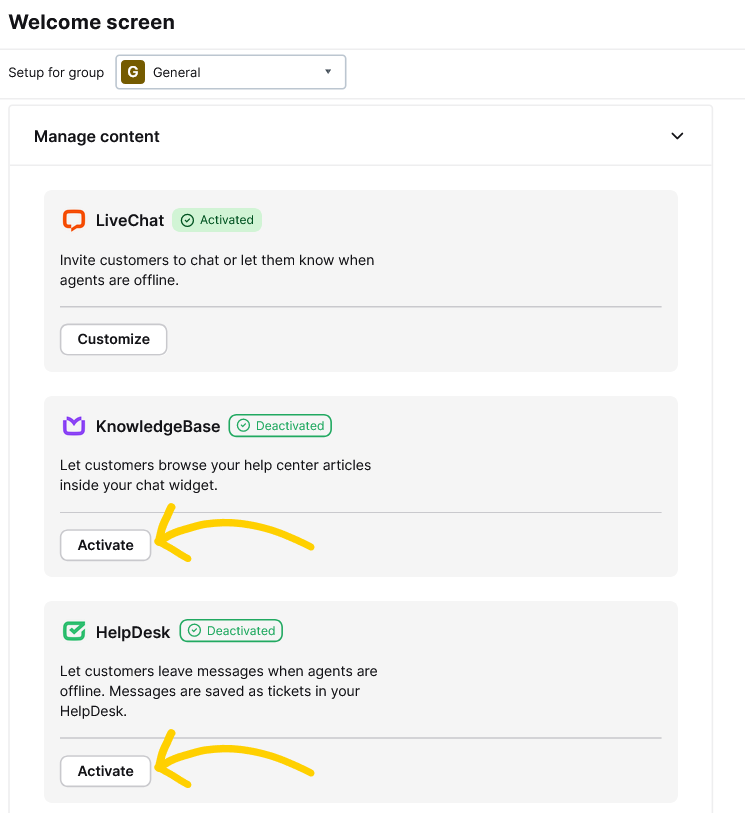
Start by navigating to the welcome screen settings section. Expand the Manage content drop-down menu.

KnowledgeBase and HelpDesk addons
- Select Activate on the HelpDesk and KnowledgeBase tabs to add these tools to your welcome screen.
- Select Customize to change the Title, Description and/or Placeholder text in the search area.

3. To disable the tab or navigate quickly to the HelpDesk or KnowledgeBase platform, select the ellipsis button and then the option you’re interested in.

- Save changes to complete the setup.
Custom links
- Select Add links on the Custom links tab.
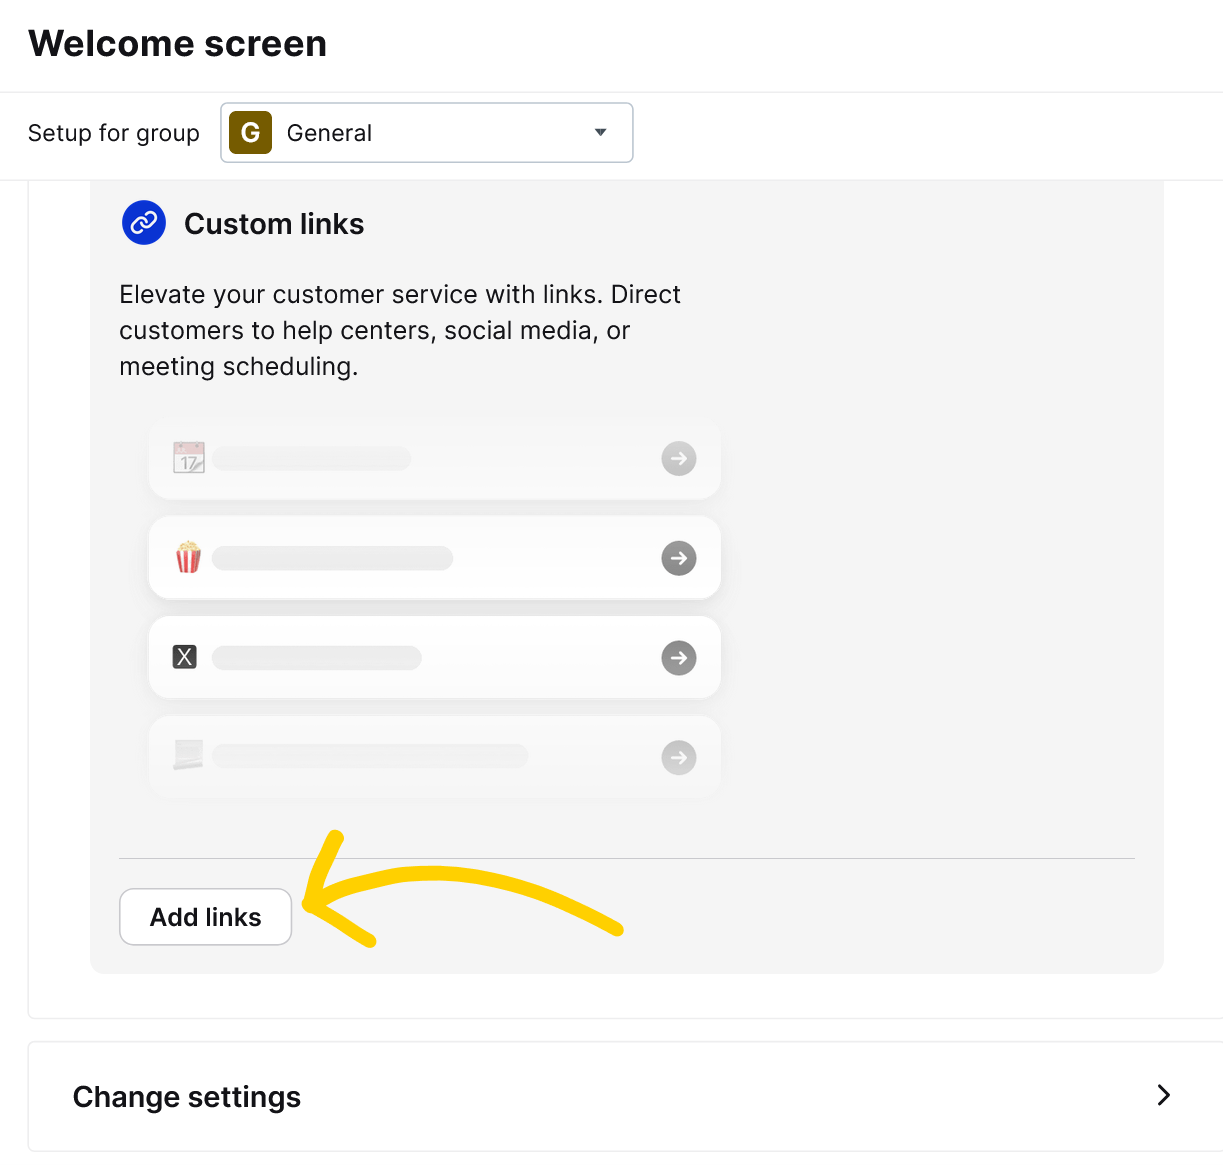
- Paste a link you wish to add to your welcome screen.
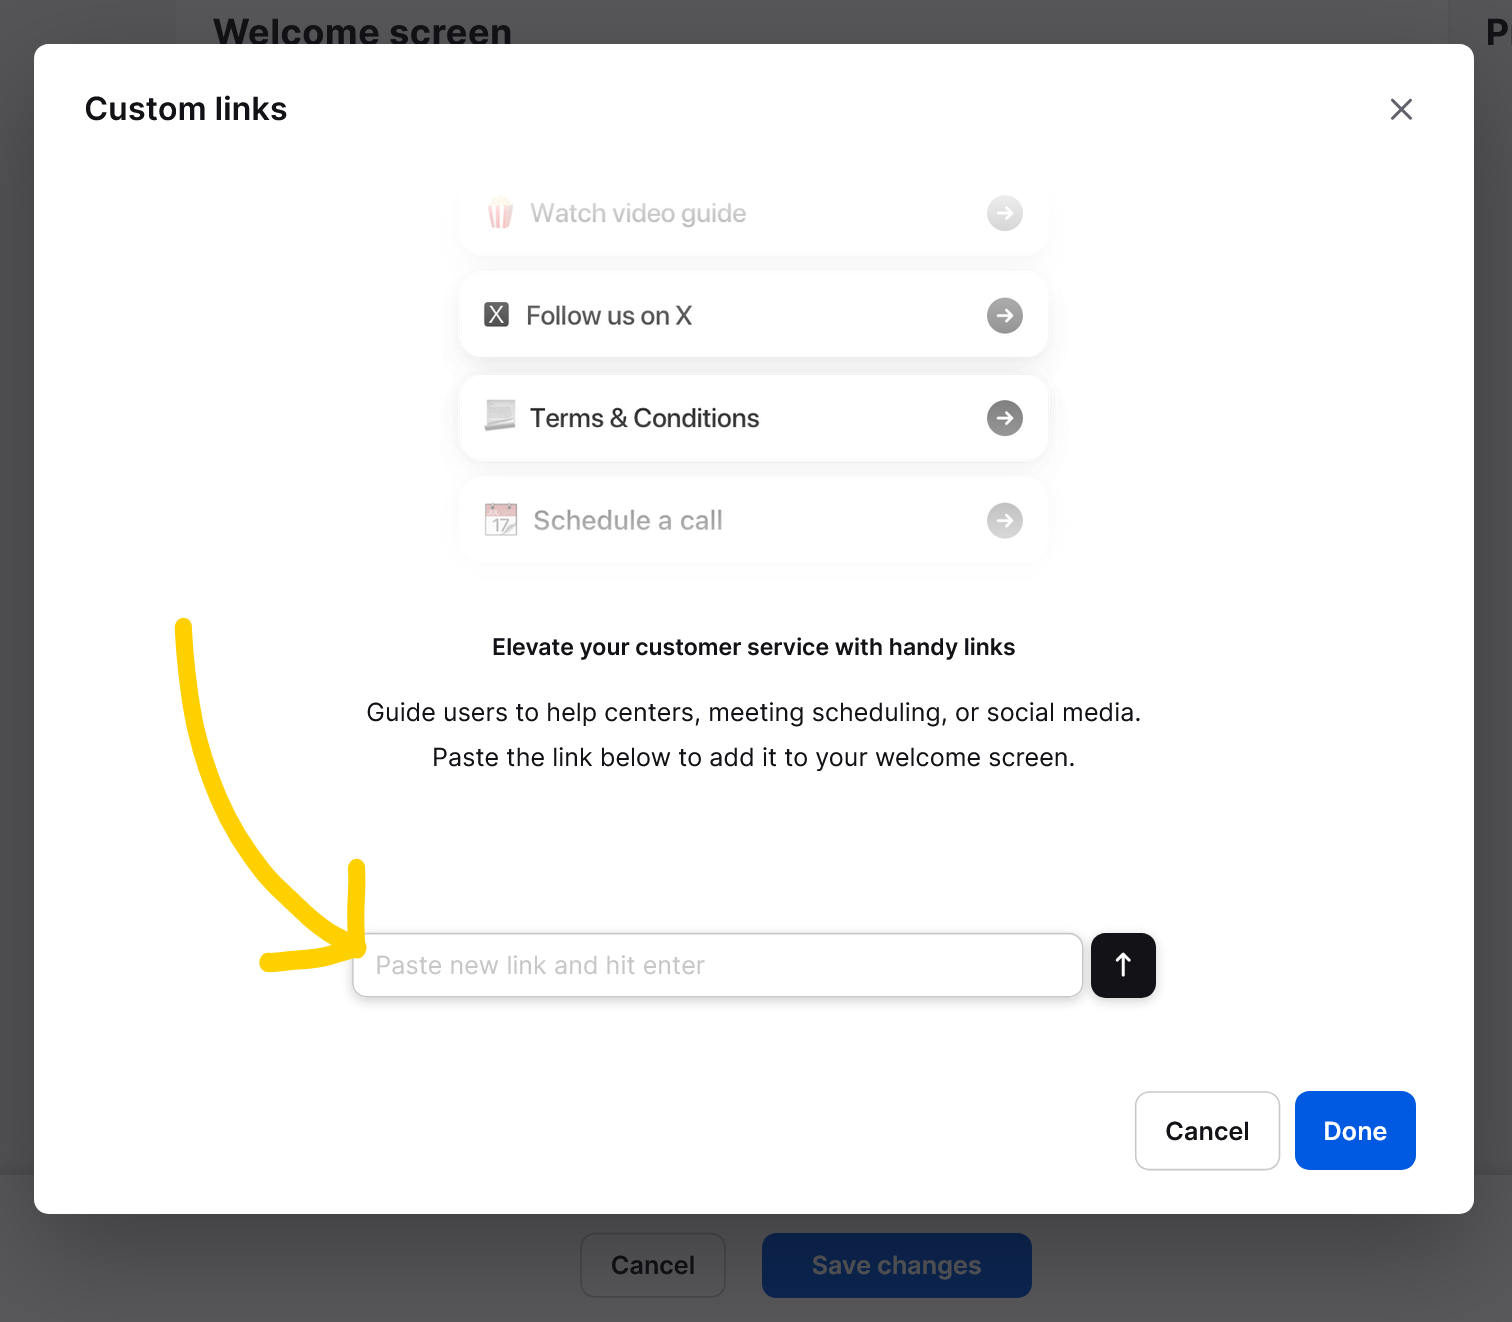
- Select the arrow on the right to place the link. Add a name text that will show up on the welcome screen instead of a raw link address.
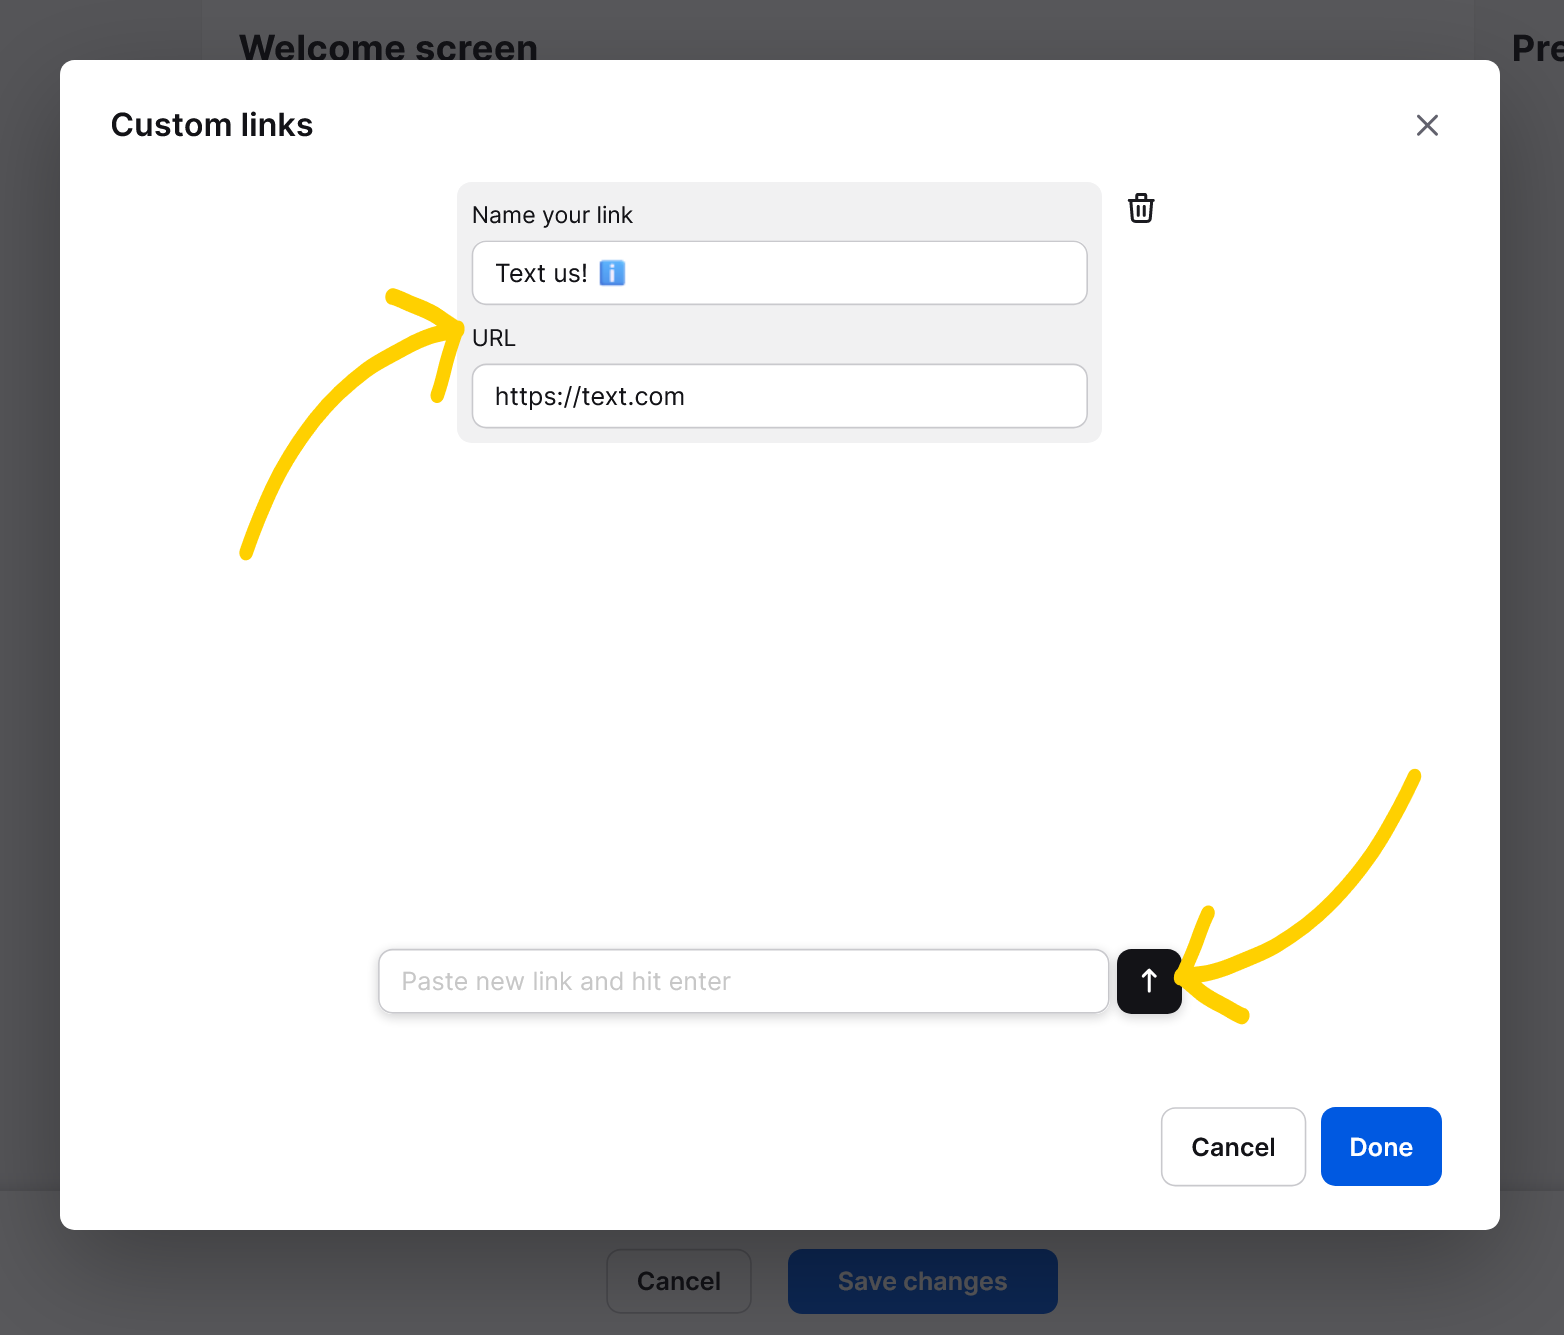
- Save changes to complete the setup.
That’s it! Your welcome screen configuration is complete. See how engagement scales, and close deals with a chat front worthy of your store!