Pricing
Go to app
User Name
Upgrade Help Center

Outbound messages

Wojciech Pollok
5 min read
updated: Mar 26, 2025

Outbound messages is a dedicated place where you can monitor your customers, manage their details, and initiate contact with them. It’s like a convenient, powerful mini CRM inside your LiveChat account!

InstallationLink icon

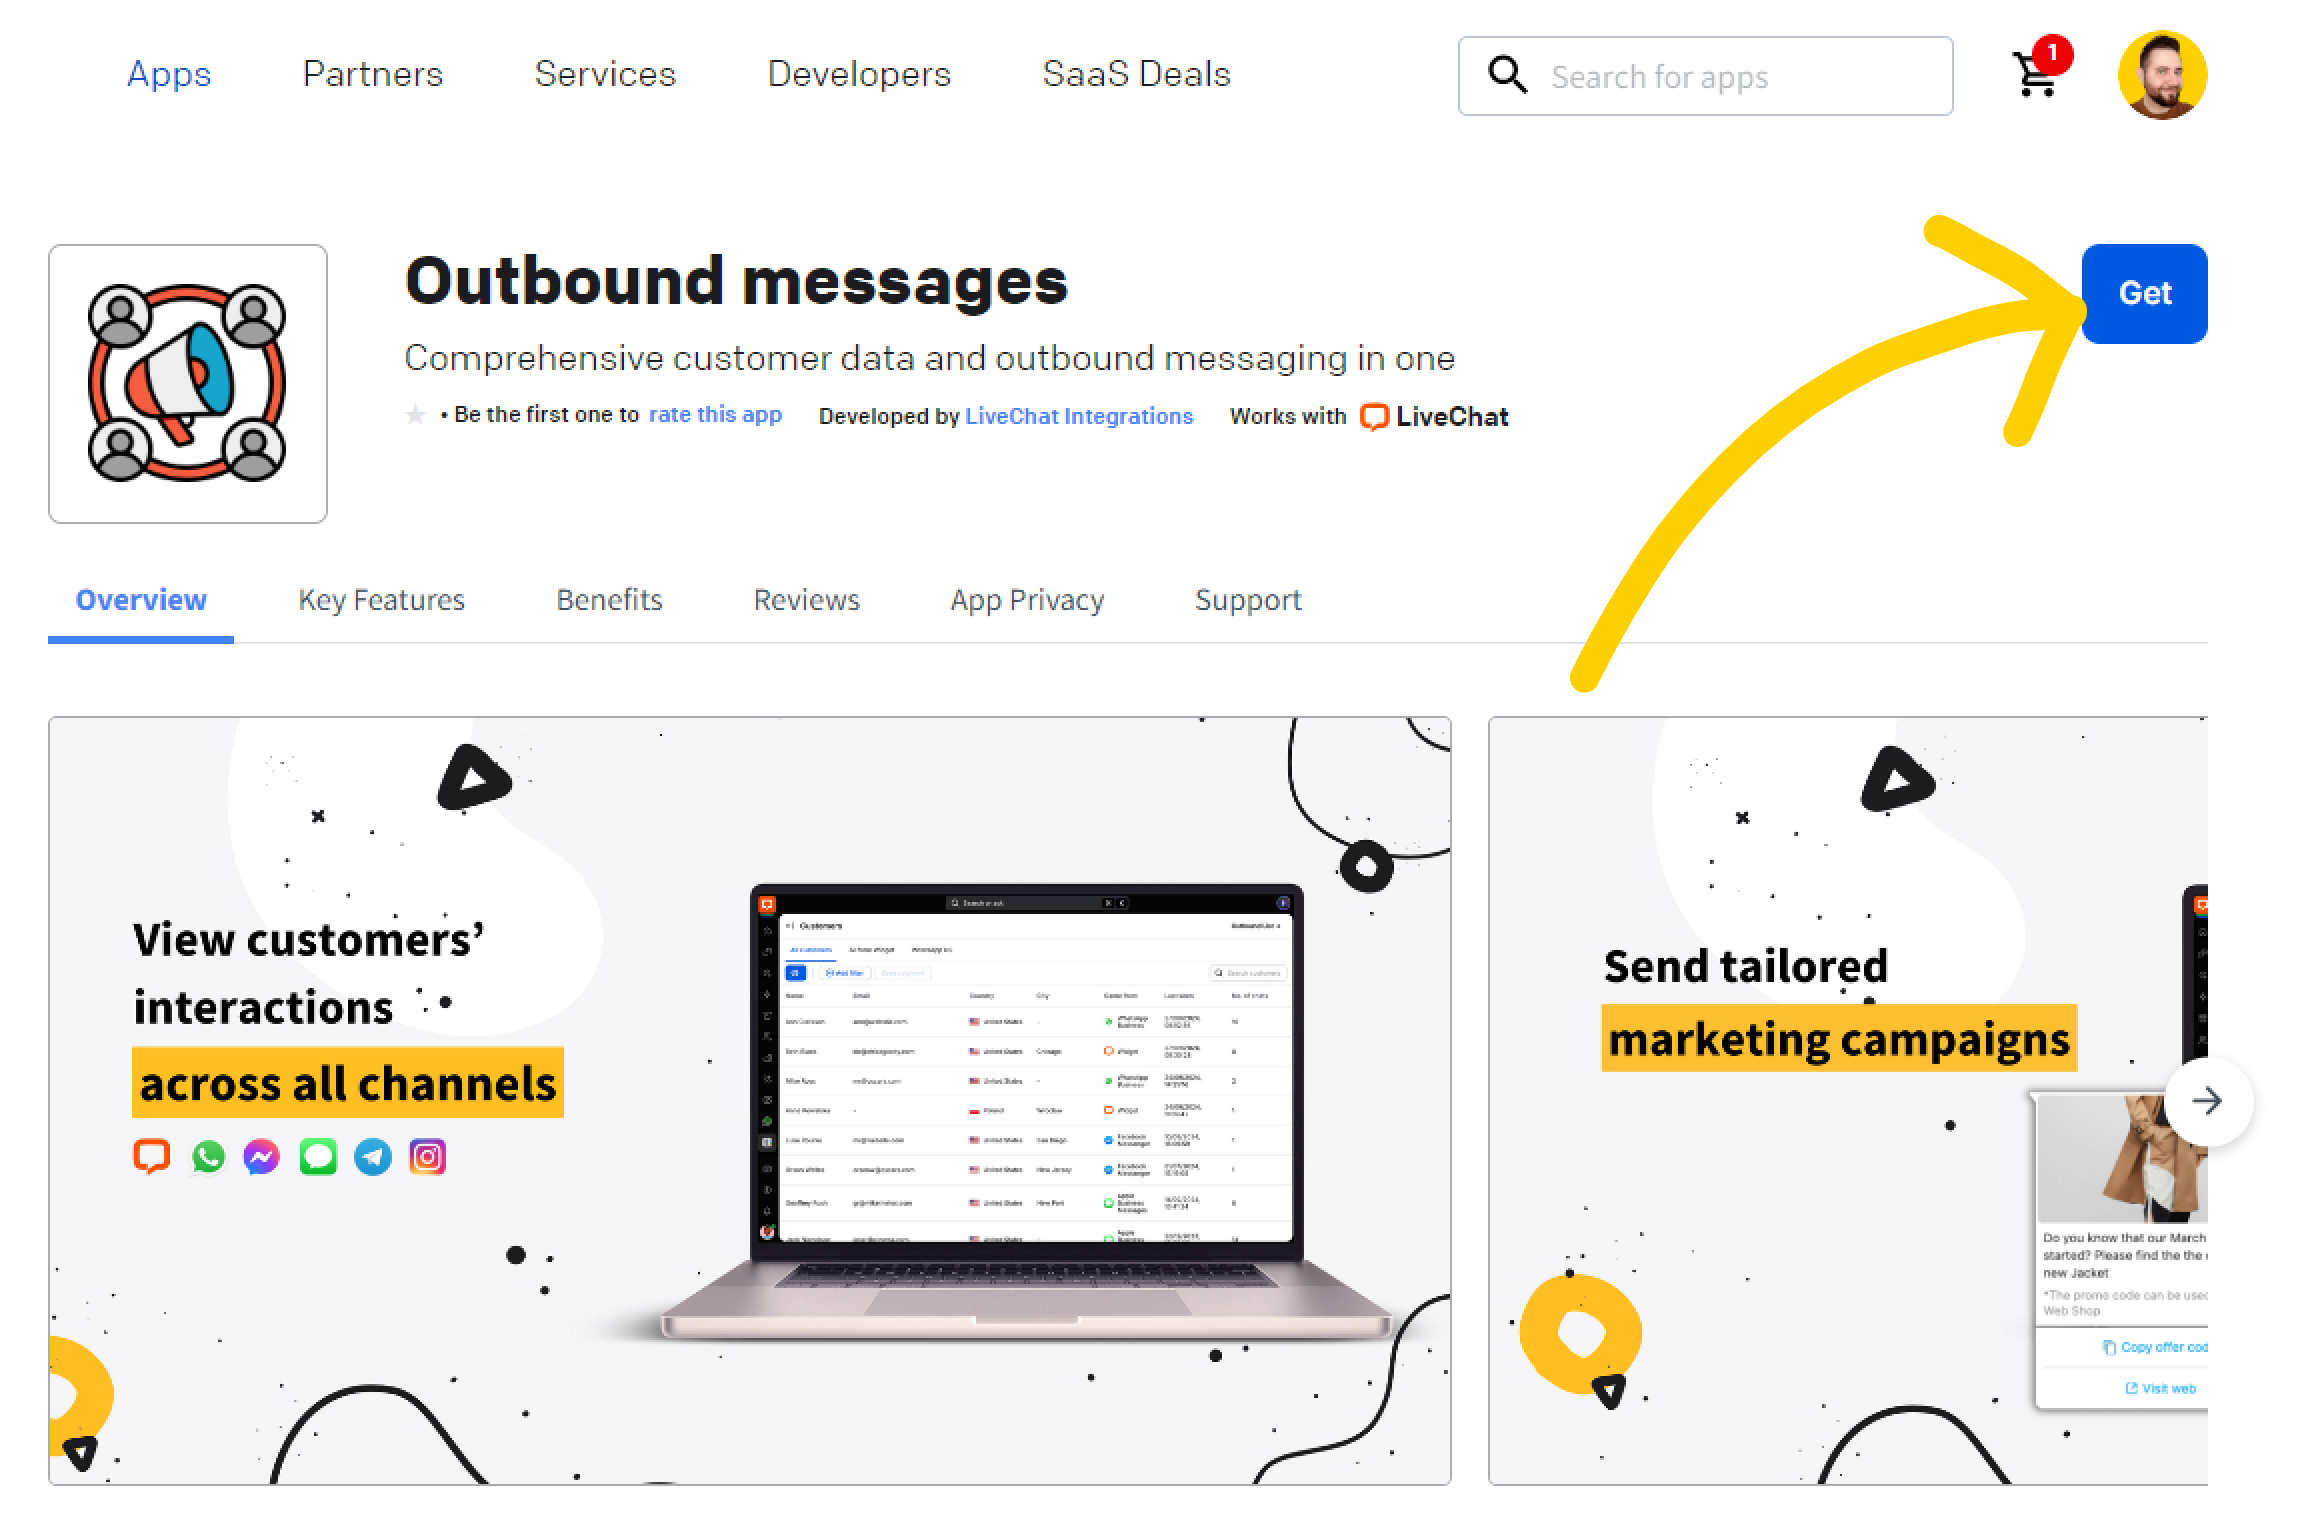
  1. Navigate to the LiveChat Marketplace -> Outbound messages app.
  2. Select Get to install the app on your LiveChat account.

Once the installation is complete, you’ll find outbound messages in the Engage -> Outbound messages section.

Let’s dive in and see what you can achieve with it!

All customersLink icon

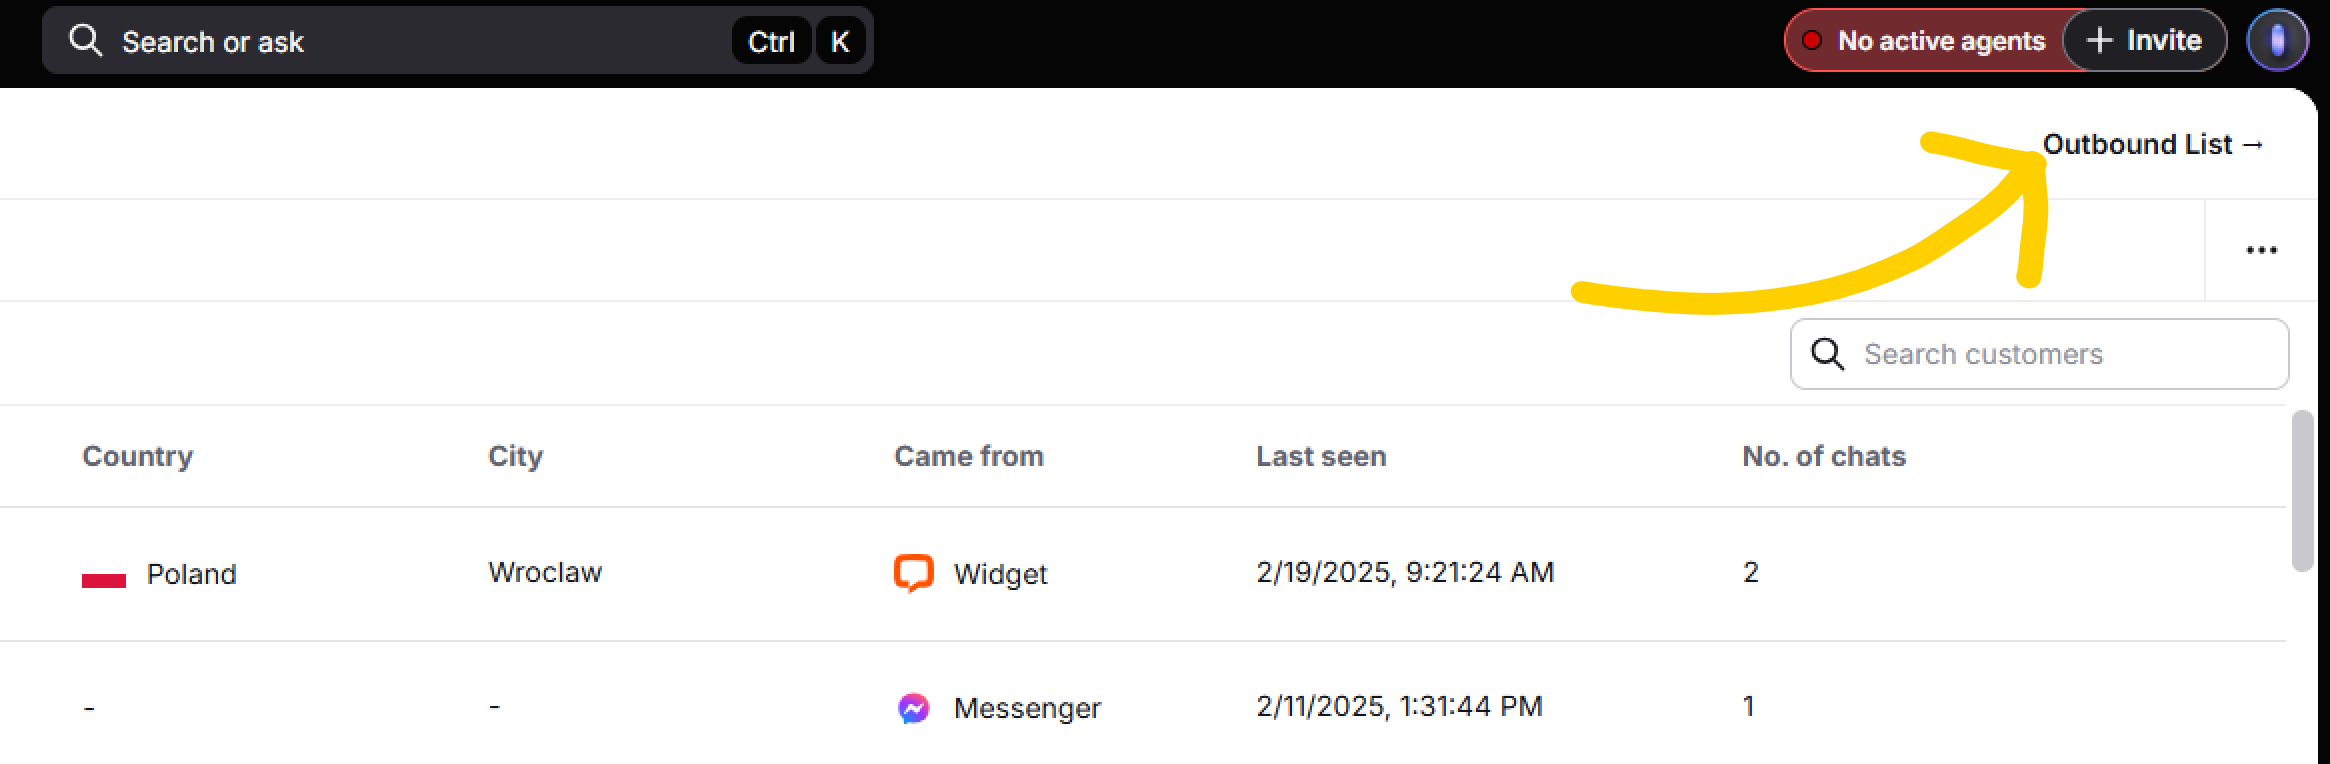
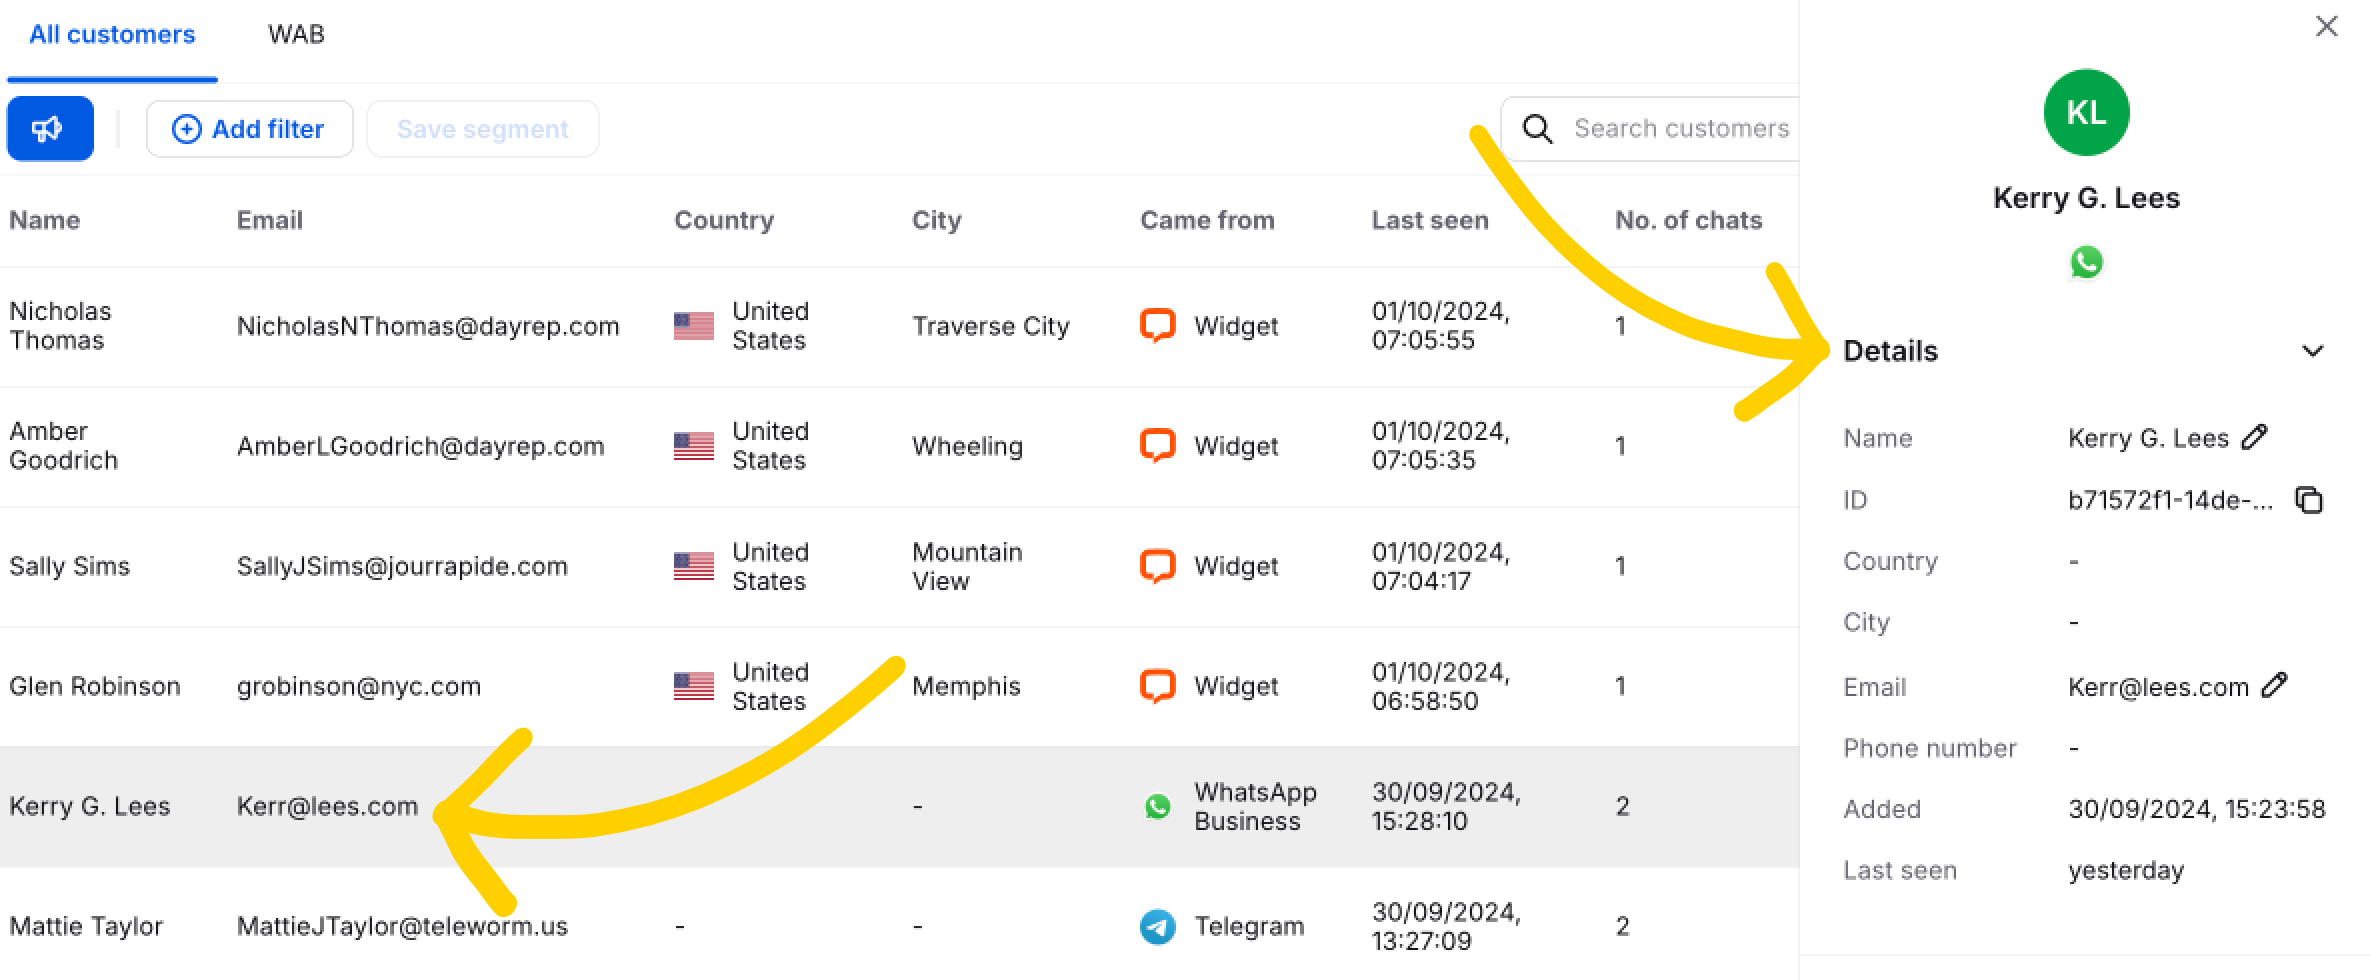
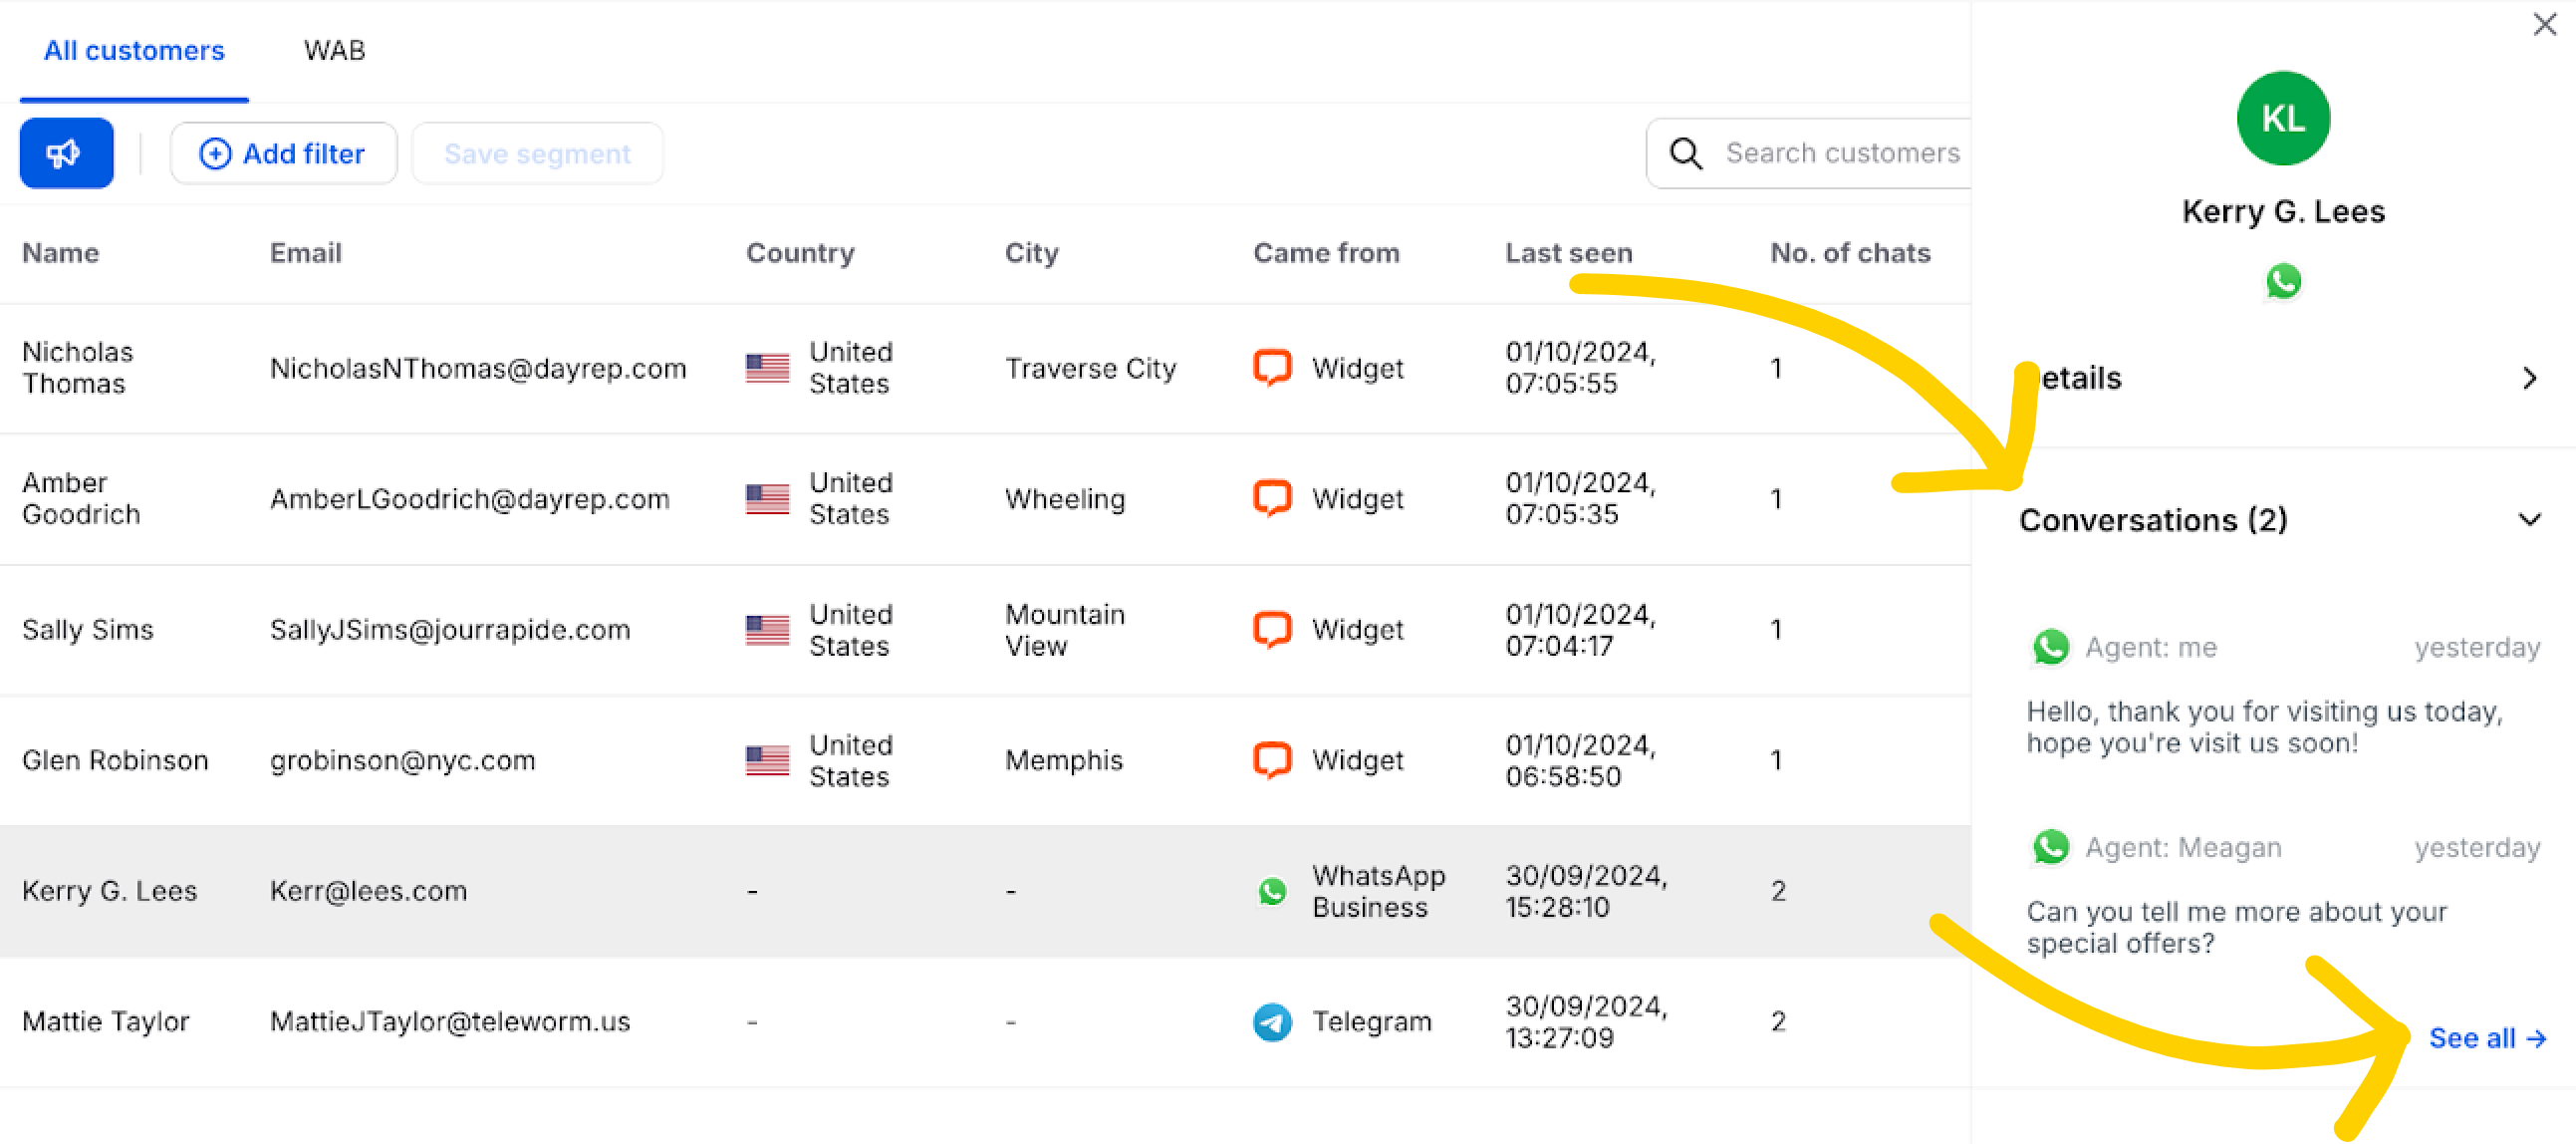
The All customers tab is where you can find a list of all of your customers along with associated data like the channels they used to contact you, their email addresses, countries, cities, number of chats they had with you, and the day of the last contact you had with them.

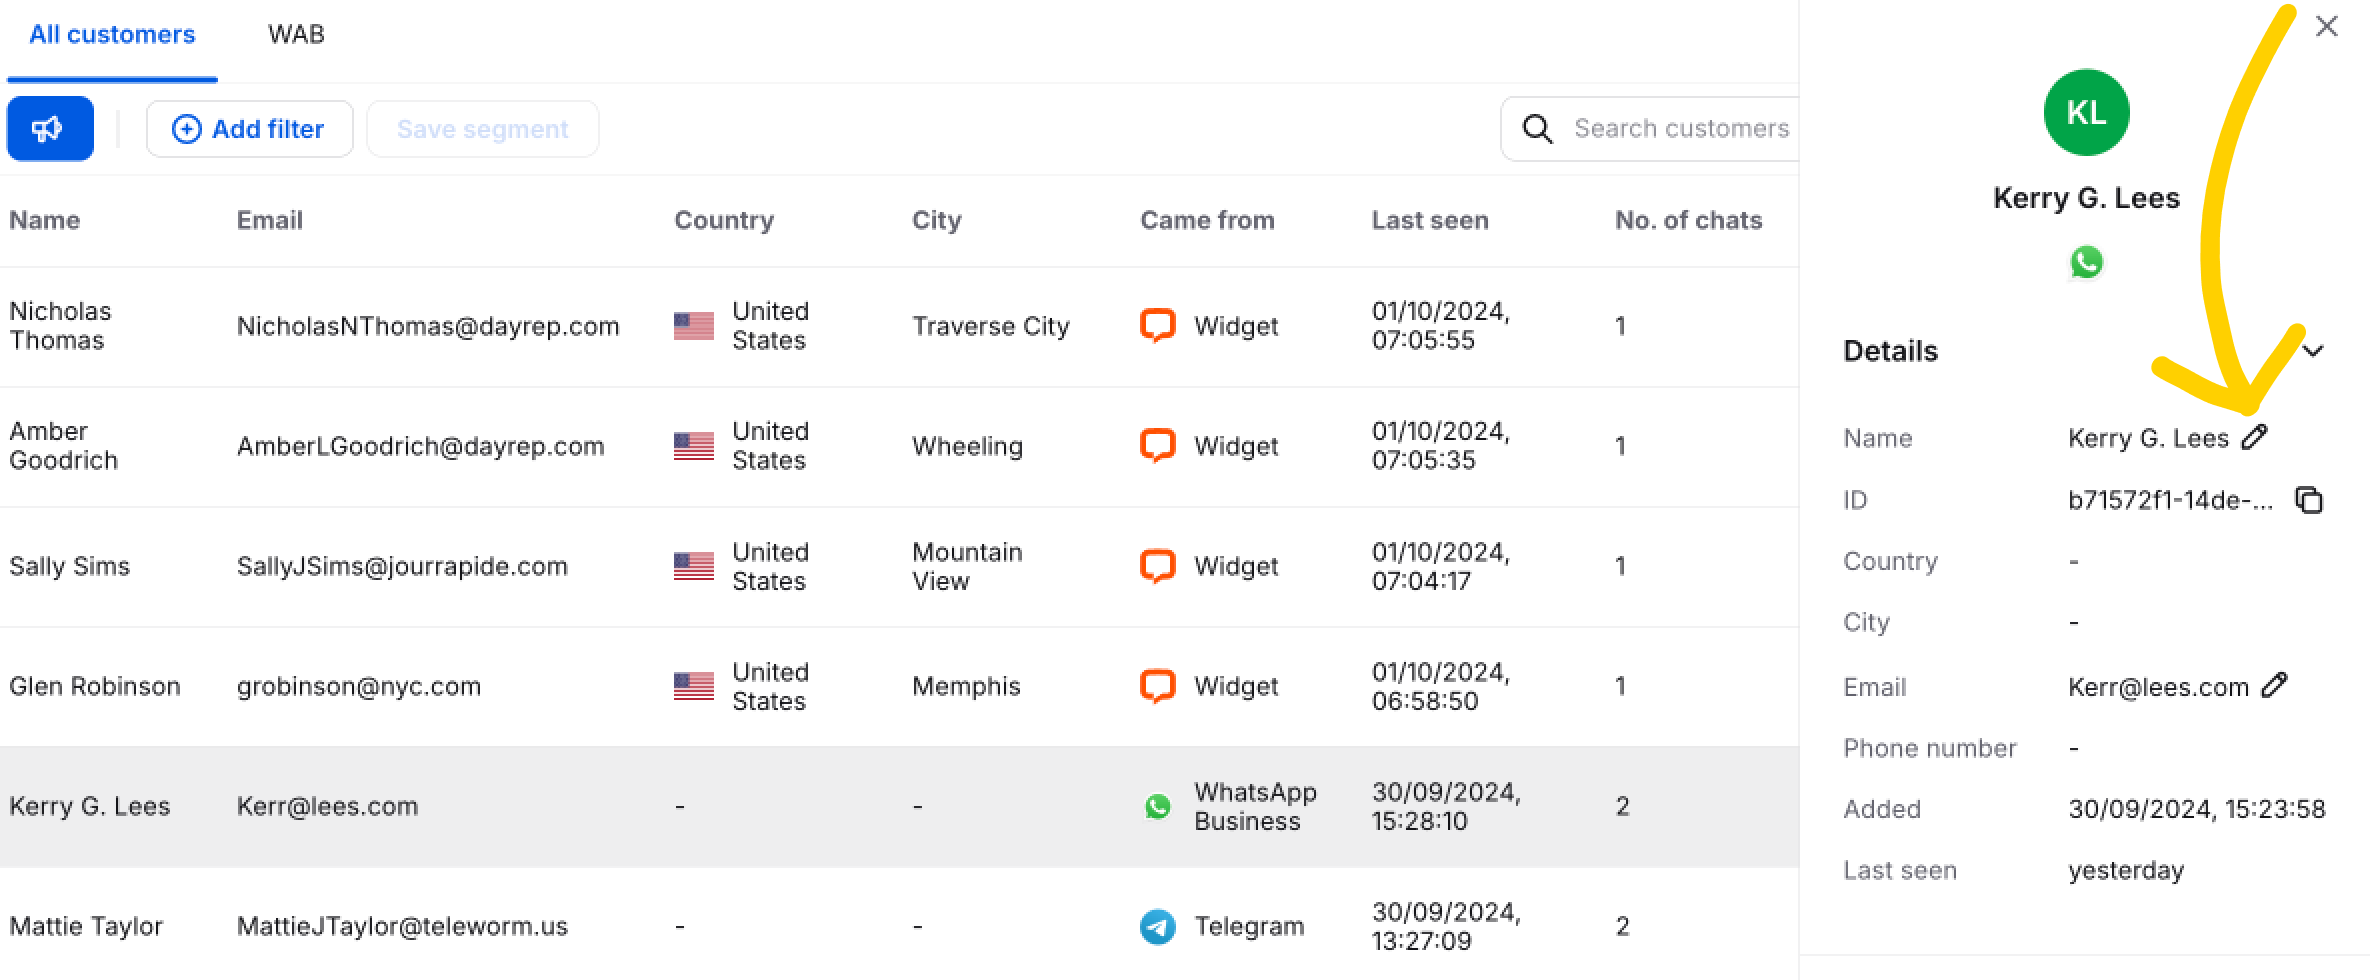
Select a customer from the list to expand the Details tab. There you can edit their record.

What’s crucial about this tab is that changing their data here will affect every other place in the LiveChat app. For example, changing their name in the Details tab will affect how they’re displayed in the LiveChat Archives section, Traffic section, or in ongoing chats!

Currently, you can edit customers’ names and email addresses, review recent conversations, and add notes.

Expand the Conversations tab to review the last two chats you had with a chosen customer. Select See all to enter archives that include all of the chats you had with this customer.

Expand the Notes tab to review the last two notes you or other agents assigned to this customer. Select See all to access all notes assigned to this customer.

To add a note, select Add new.
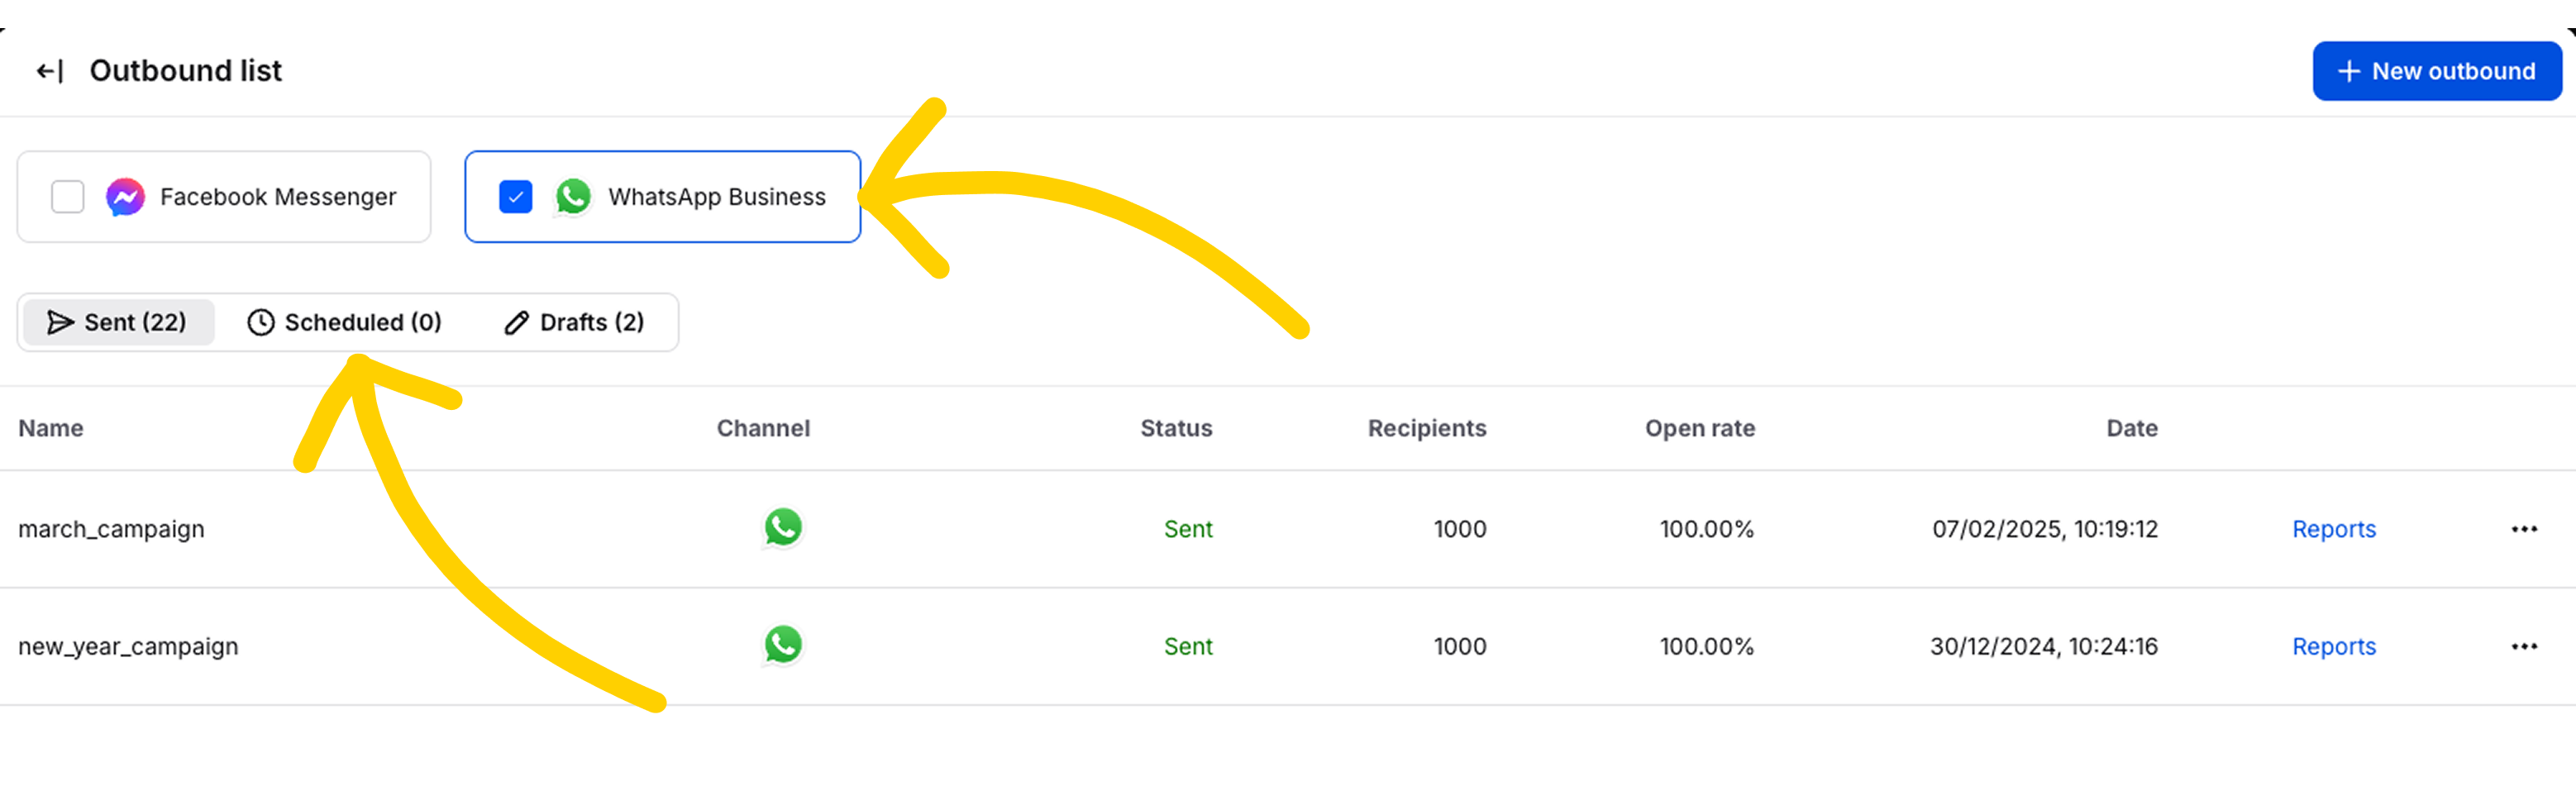
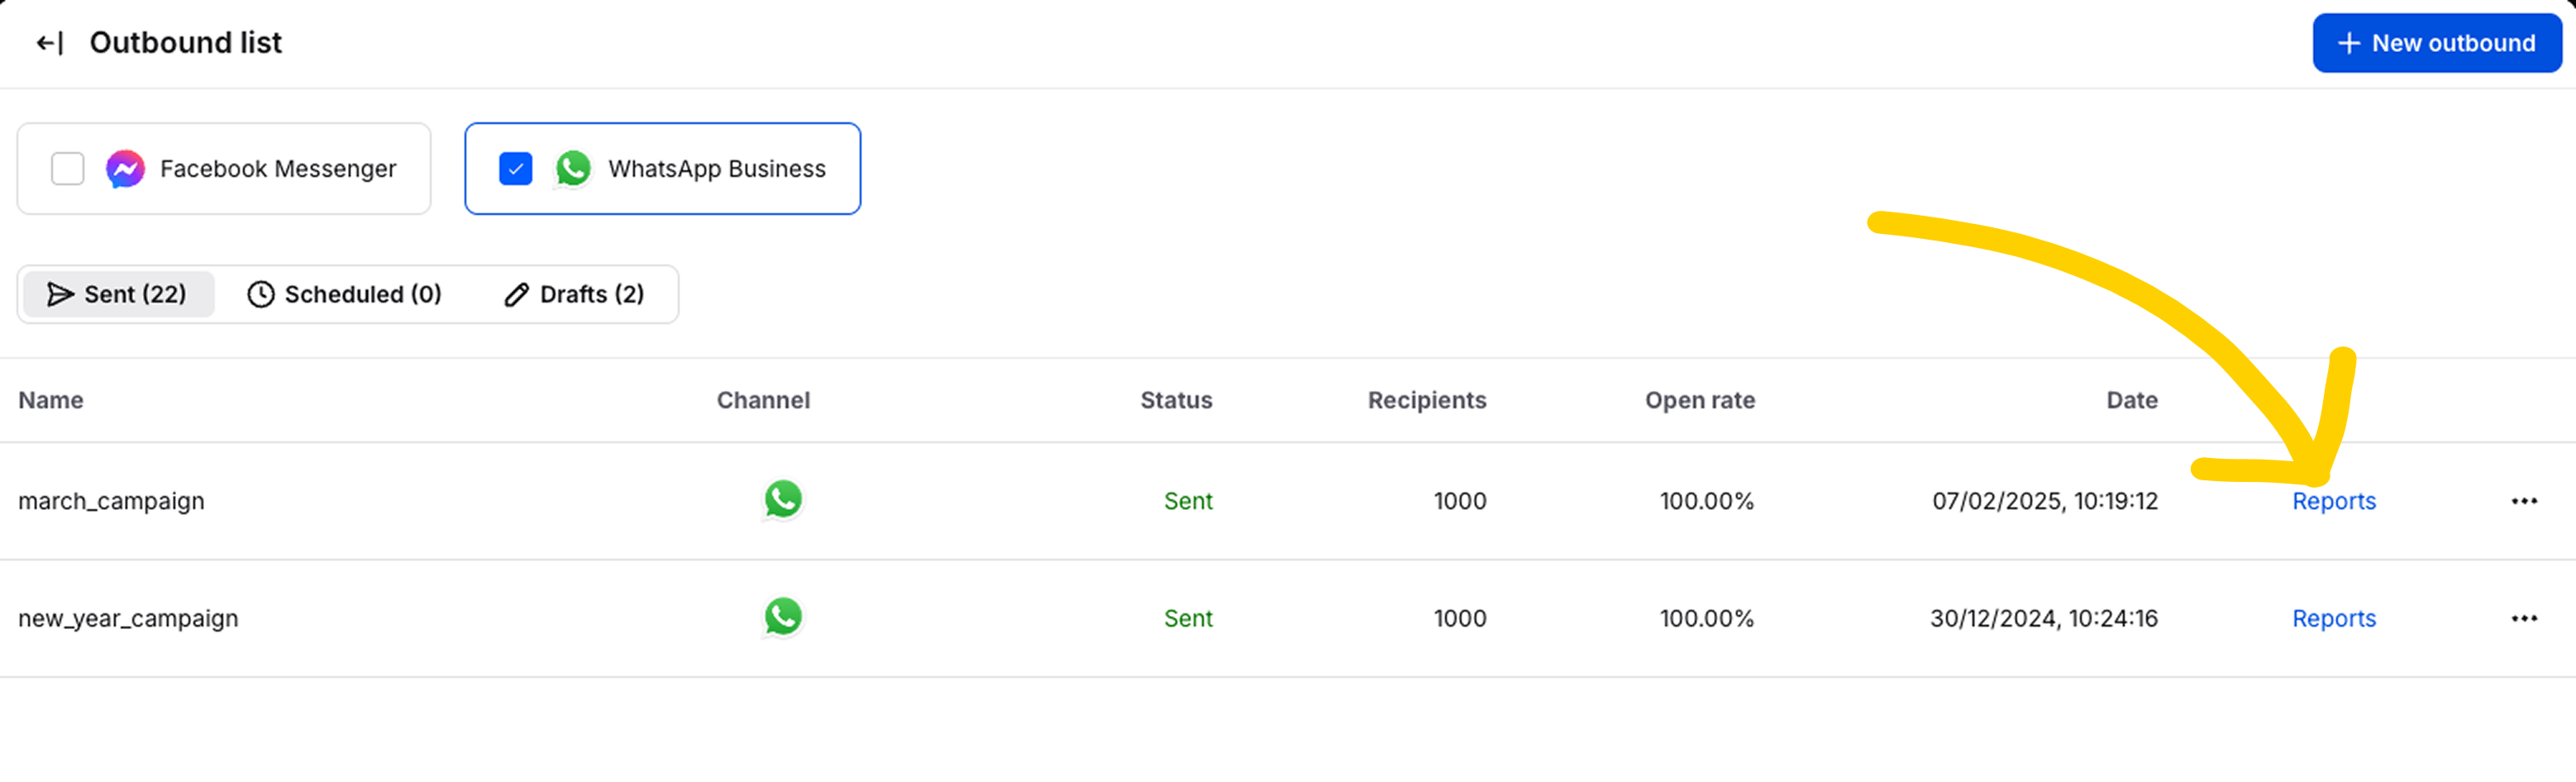
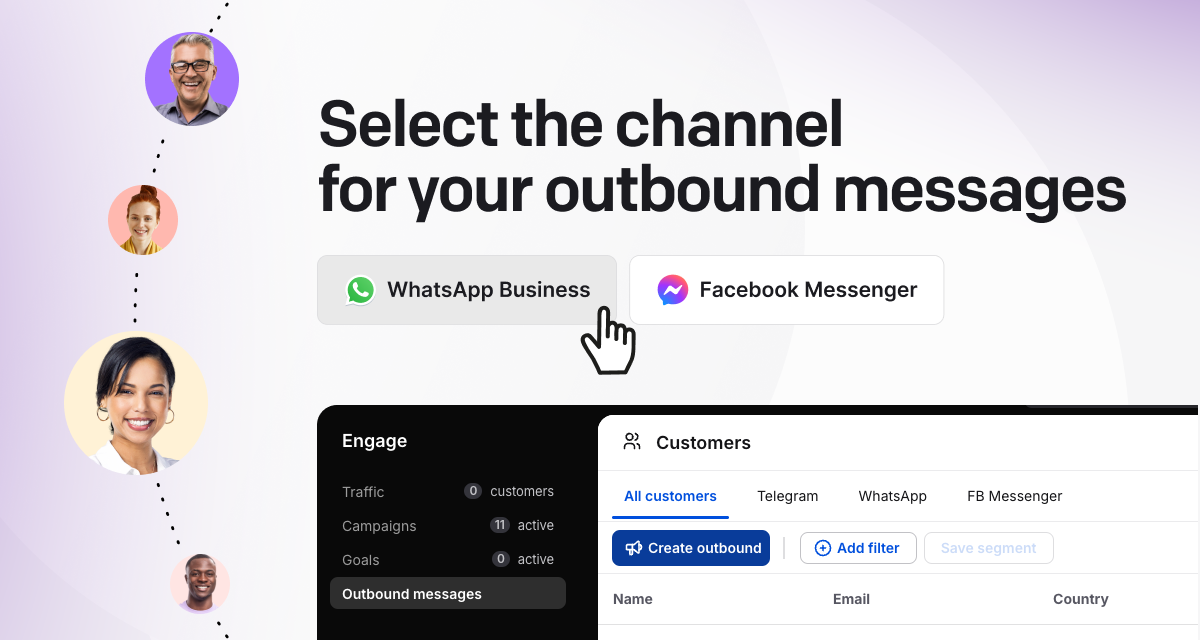
These notes will also show up in live chats whenever a customer gets connected with you or your agents!

Create outboundLink icon

This section lets you set the outbound communication in motion. For now, it supports WhatsApp and Messenger messaging only, but you can expect the list of supported channels to grow in the near future!

Please note that you need to have the WhatsApp Business and/or Messenger integrated with your LiveChat account for this feature to work correctly. You also need to have approved Meta message templates in order to send outbound messages.

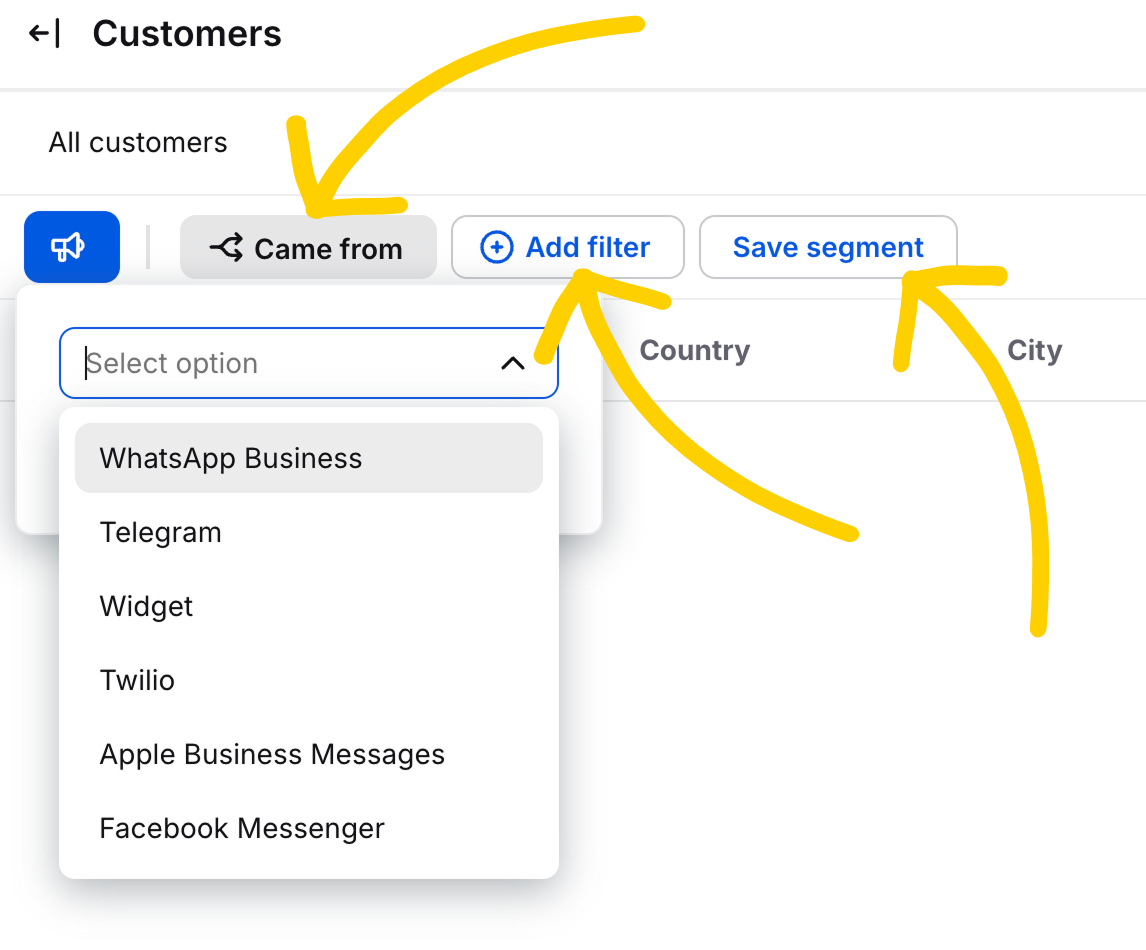
Segments and filtersLink icon

Start by creating customer segments that you’d like to send your campaigns to. You can do that easily in the Customers section.

There, you can select your customers means of contact, add additional filters, and save your customers segment.

To create a WhatsApp outbound campaign:Link icon

1
Hover on the blue megaphone icon. It will expand with Create outbound text - select it.
2
Select WhatsApp Business as the channel for the outbound.
3
Enter the name of your outbound (this name won’t be visible to your customers).
4
Select one of the template messages accepted by Meta. You should see a preview of the chosen template on the right side of the screen.
5
Select customer segments that should receive the outbound message. You can only select segments that include at least one customer with an active WhatsApp phone number.
6
Enter any additional phone numbers that you want to receive outbound.
7
Select Send outbound.

Once the messages are sent, the system will start delivering them. This process may take a moment. Data about delivered messages will be updated accordingly - live.

To create a Messenger outbound campaign:Link icon

1
Hover on the blue megaphone icon. It will expand with Create outbound text - select it.
2
Select Facebook Messenger as the channel for the outbound.
3
Edit your message. You need to fill in a title, you can also change/remove/add the subtitle, up to three buttons, and an image. To add a new feature, click on the plus icon in the top-right corner of the message template. To edit or remove, just hover over a specific item and click on the pencil or the trash icon. Once you’re done, select Preview ->.
4
Fill in your outbound name, select customer segment, and either send it right away, save as a draft, or schedule it for later.

Once the messages are sent, the system will start delivering them. This process may take a moment. Data about delivered messages will be updated accordingly - live.

Outbound listLink icon

You can enter your outbunds list by selecting the Outbound list -> button in the top-right corner of the app.

Here, you’ll see the complete list of all your outbounds. From here, you can view reports about the sent outbounds, edit drafts, or delete any of them. You can find the last two options by selecting the ellipsis button.

You can mark what channels you want to review and filter your view by Sent, Scheduled, and Drafts.

Hover a cursor over a specific outbound name to get a preview of the template.

Select Reports next to a selected outbound message to review its statistics.

Here you can check how many recipients got the message, how many of the messages have already been delivered, what’s the open rate, and other relevant information.

Additional featuresLink icon

Tags - add predefined tags to any customer in the Customer Overview.

Custom fields - collect and display relevant customer information, like shopping interests, to personalize interactions. Use them in Outbound messages for your campaigns.

API - keep your CRM or third-party systems in sync with minimal effort.

That’s it. Now it’s time to send your first outbound and delight your customers with valuable, targeted messages. Try it out, and in case of any issues, don’t hesitate to chat with us. We’re here 24/7!

Was this article helpful?

Got it!

Thanks for your feedback.

Thank you!

We’re happy to help.

RELATED ARTICLES

Customer Details

Learn how to use Customer Details to provide even better customer support. Discover apps and customization options that make your work more effective.

Read the article

Engage: Traffic section overview

Gather useful information on your visitors and their activities on your site. Check how to use the Traffic section to track data in LiveChat.

Read the article

Start using LiveChat® now!

Free 14-day trial AI-driven features No credit card required

Still not convinced? Discover all LiveChat features

Discover Text products: